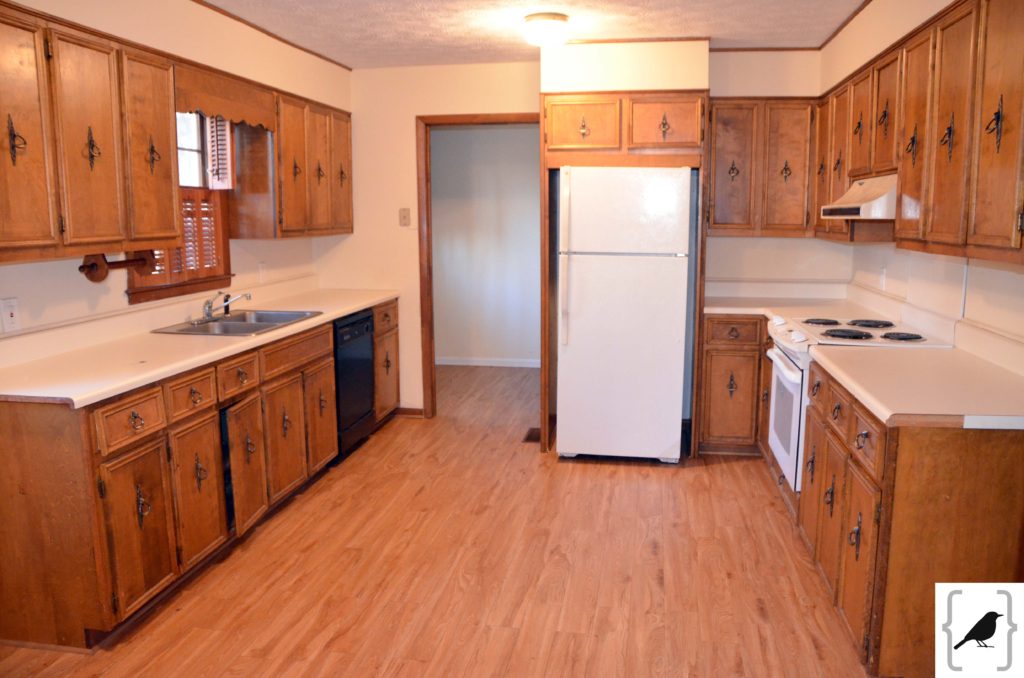
So, this is the picture on the listing for our new house that drew us in… the 1970’s kitchen we had always dreamt of…. kidding… definetly kidding… sledge hammer was all that came to mind… or lighting a match which in hindsight might have been the better option… I’m sure you’ll agree in just a few minutes!
This was DEMO DAY…the first room we planned to tackle and the room that created the snowball effect on the rest of the house. Given you are about to scroll through 75 pictures you will quickly see why it’s taken me nearly a YEAR since we moved~in to get to the point of being able to sort through all these pictures and all the thoughts in my mind about this room … and as it goes with most home renovations of this nature, the surprises were ready and waiting to send us on an adventure no one would sign up for if they knew in advance (i.e. if the previous homeowner had actually been honest… and the inspector had been worth a hill of beans… my blood pressure is going up just thinking about it)
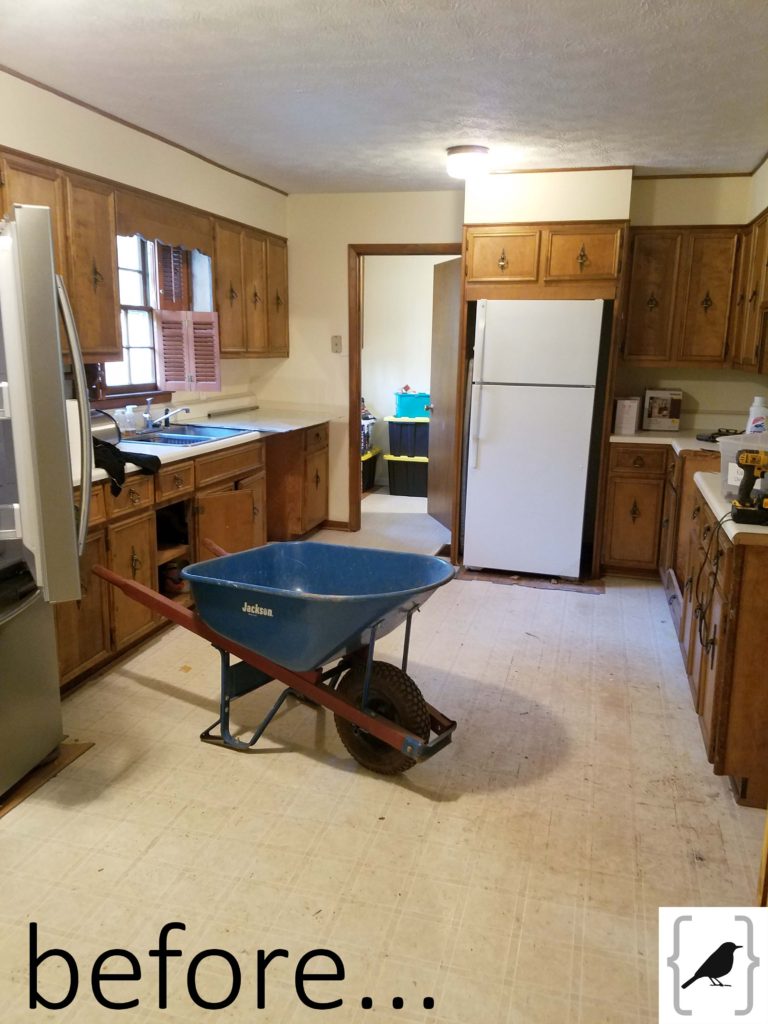
Demo day
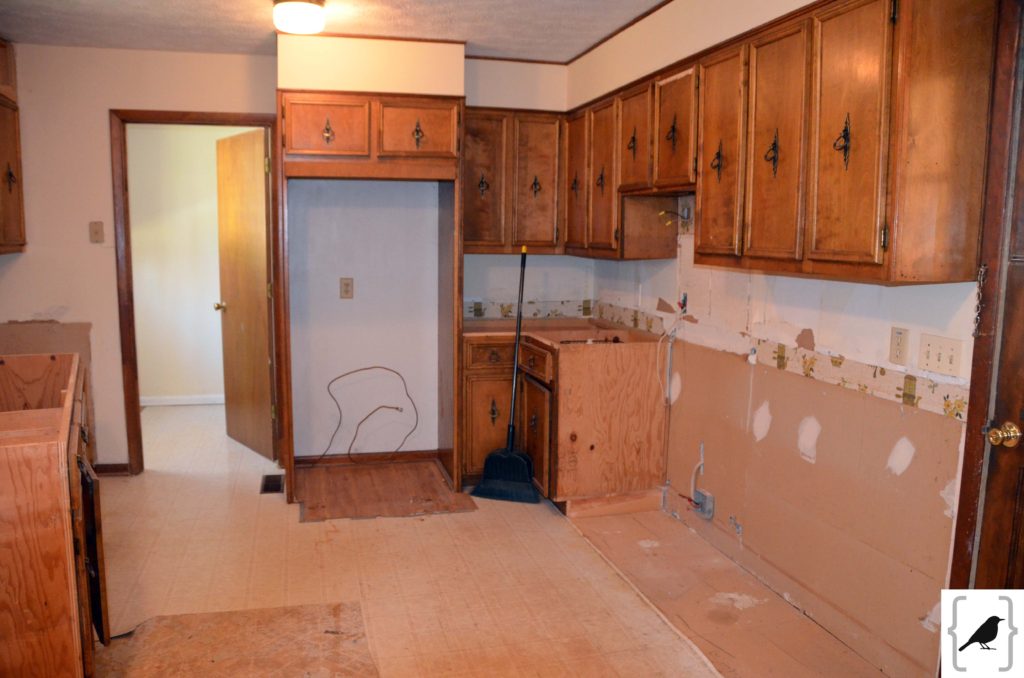
Anyone crying over these cabinets going in to the dumpster?
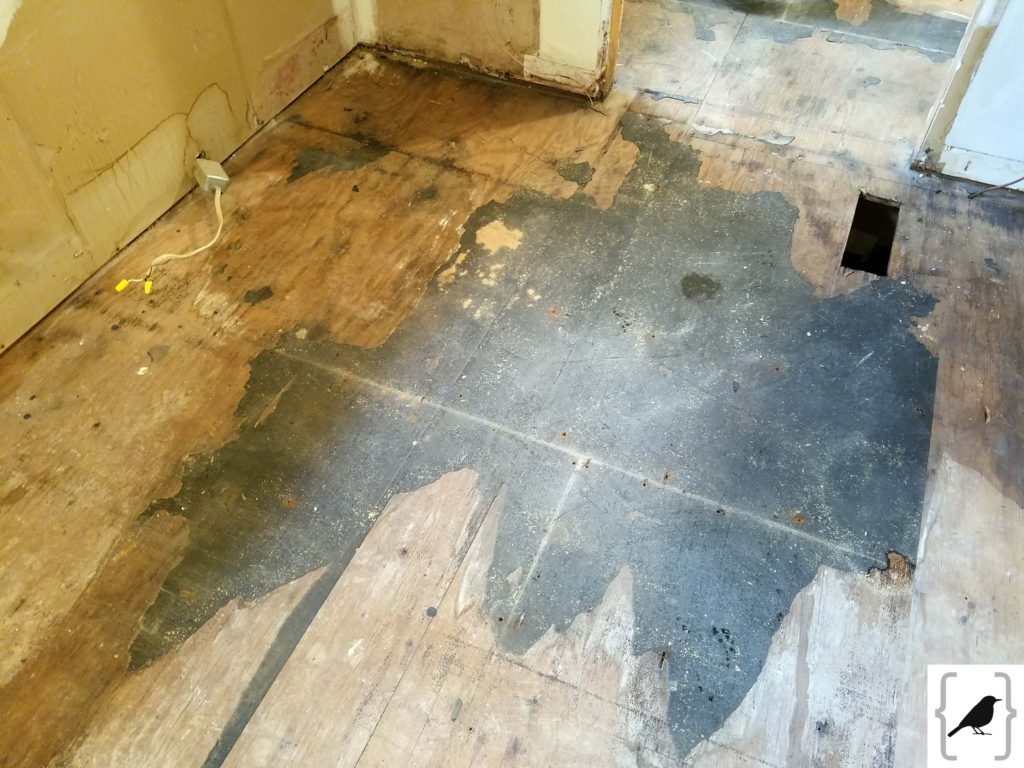
So, let’s not actually remove flooring that is damaged, let’s just put more on top. Can you count the layers with me? Moving up from the sub-floor: 1 patterned linoleum… 2 tile look linoleum… 3 hardwood look linoleum… wait, is that moisture I see as we peel back top layer 3… why yes it is… is that water I see as we peel back middle layer 2, why yes it is… is that mold I see when we peel back bottom layer 1… why YES. IT. IS.!!!!!!!!!!!!!!!!! Oh goodie!
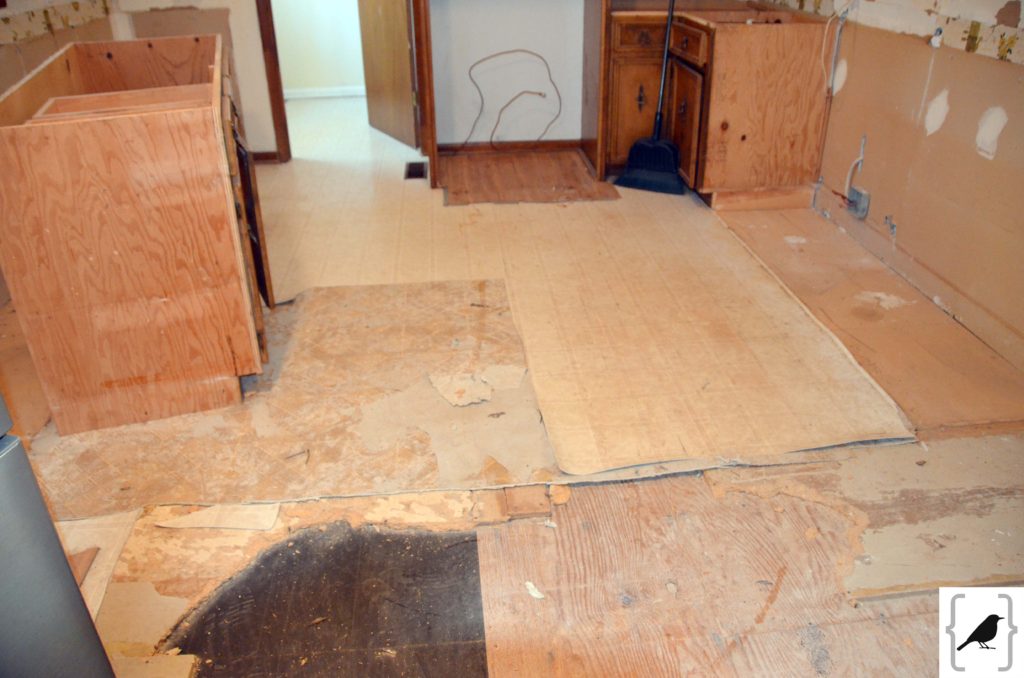
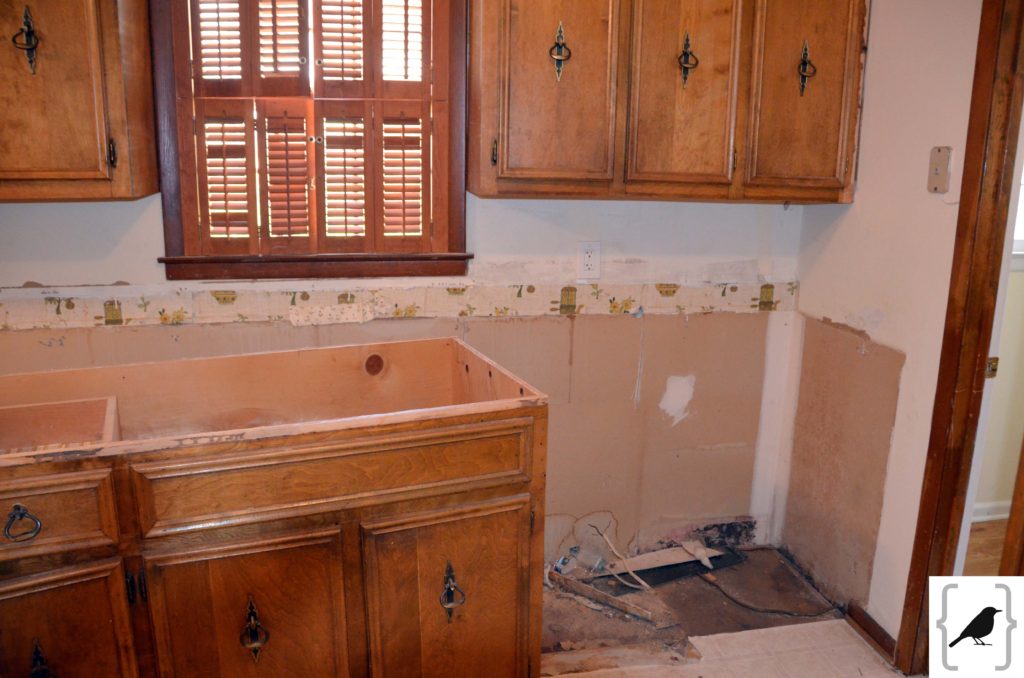
Too bad the entire room didn’t have that nostalgic wallpaper left and oh, the sub floor under the 3 layers of linoleum… yes, they are wet, deteriorating and covered in mold… so let’s just tear out all the subfloors shall we… how the heck this floor never caved in is beyond me!
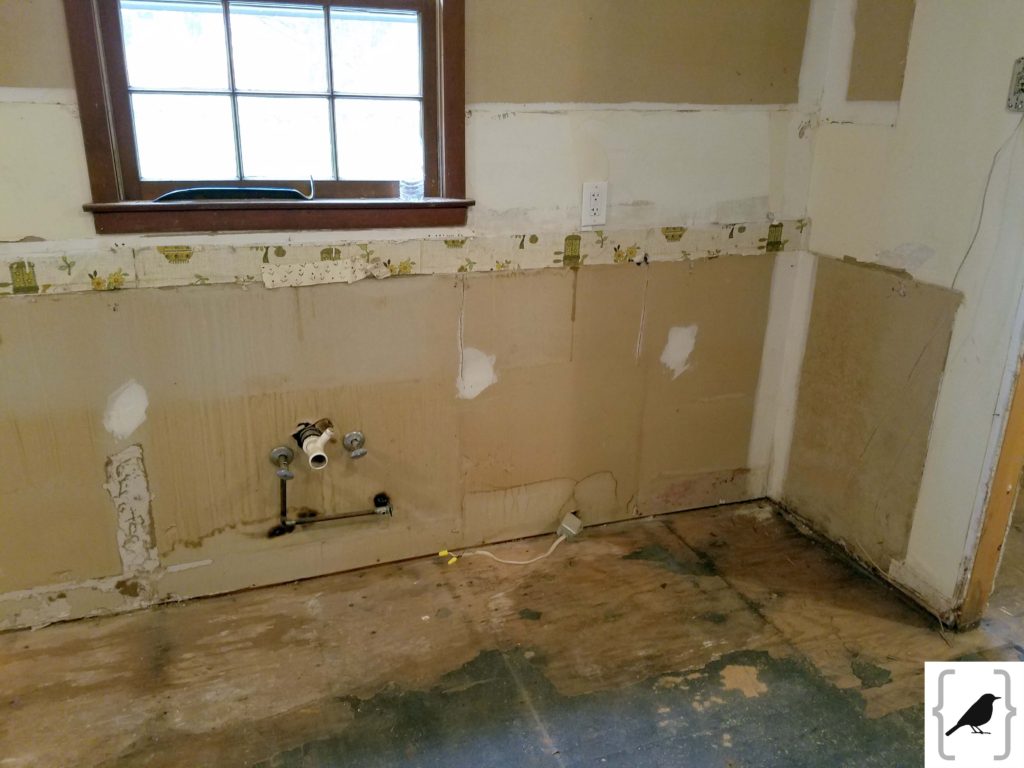
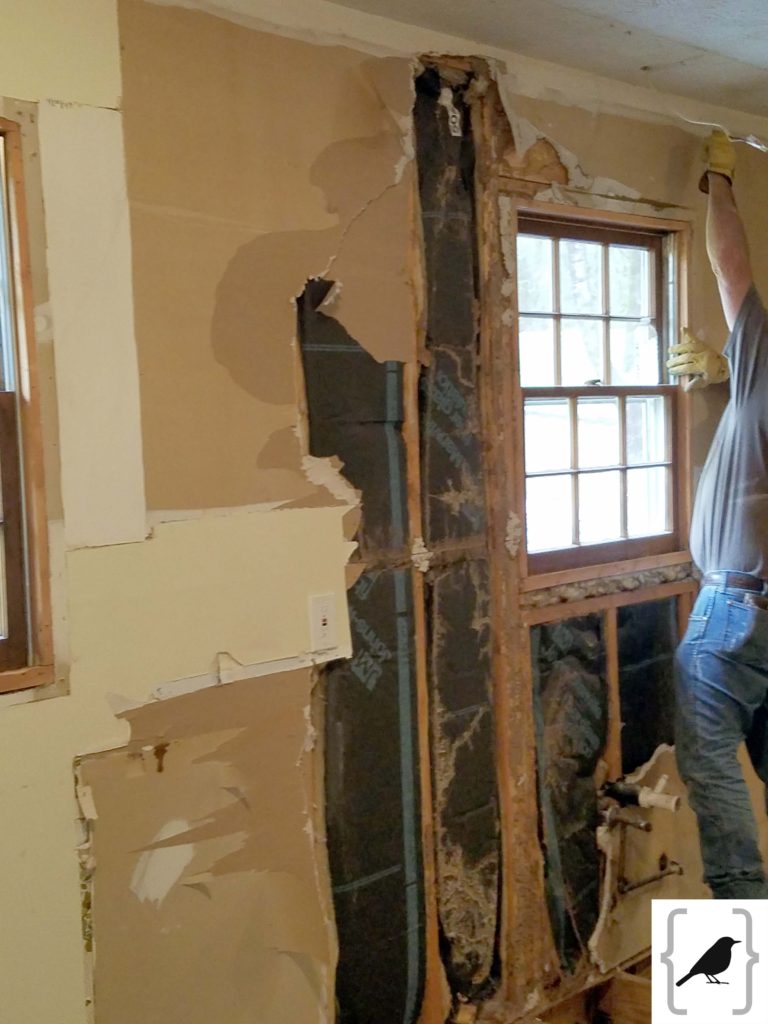
The cabinets came off the walls quite easily… how is that?… oh, because the walls had been EATEN. BY. TERMITES… check out the super highway they created. OUR HEARTS SANK AND WE WERE SICK TO OUR STOMACHS… y’all… I can’t even tell you how we were feeling… Yes, the homeowner did disclose THAT THERE WAS NEVER ANY TERMITE ACTIVITY. {it’s a long story so I’ll just leave it out for now} @#$%^&*! {any guesses what I just said?}
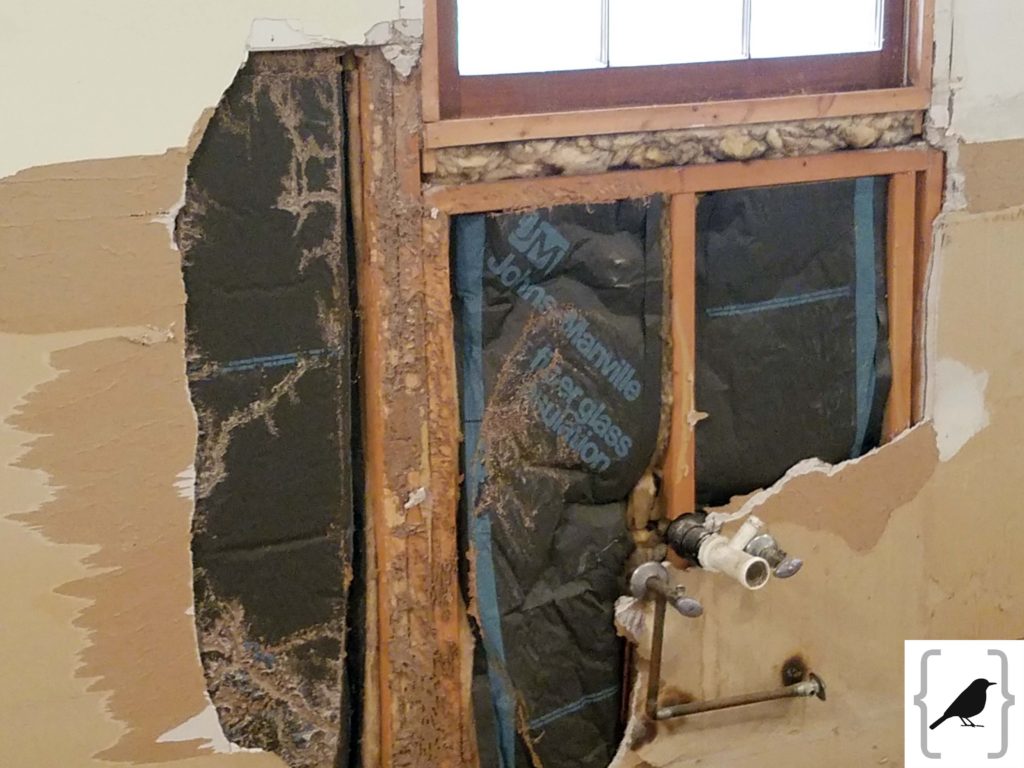
Here’s more termite damage…
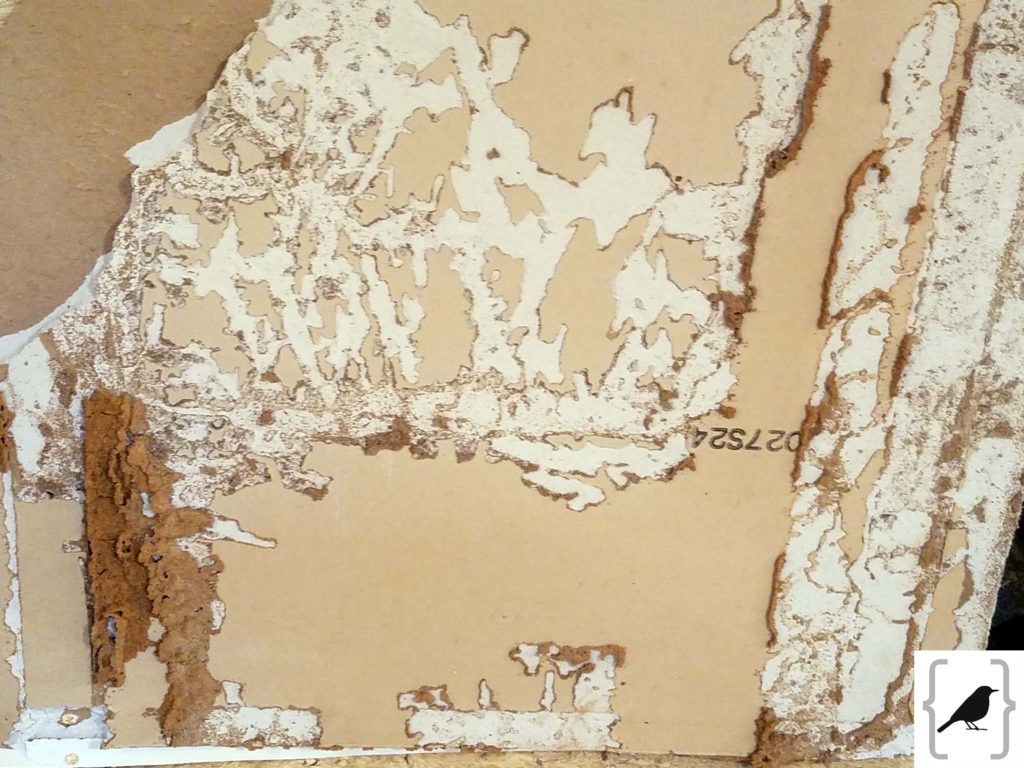
and more… {probably 30 more pics I could have blessed you with but I think you are getting the idea}…
another peak at the subfloor now that it’s all uncovered…
Now, say goodbye to the subfloor… oh and under the subfloor at some point it was pretty much a place to dump garbage and it smelled like urine… oh goody! Let’s add crawl space clean out to the list of tasks being added on, shall we?
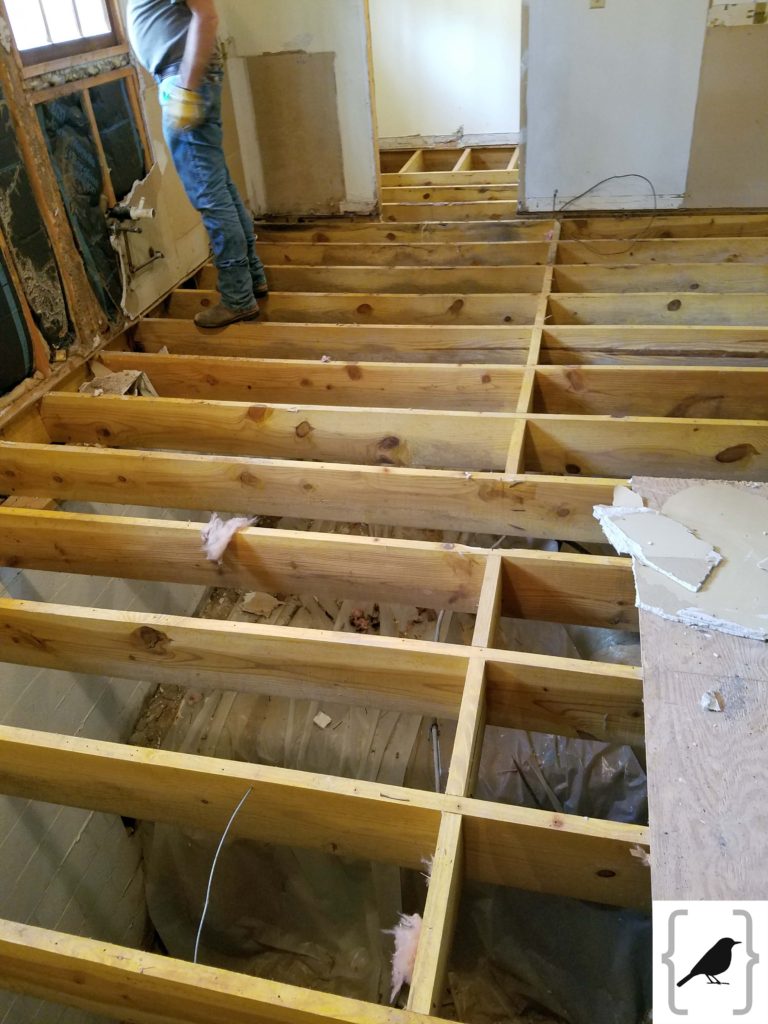
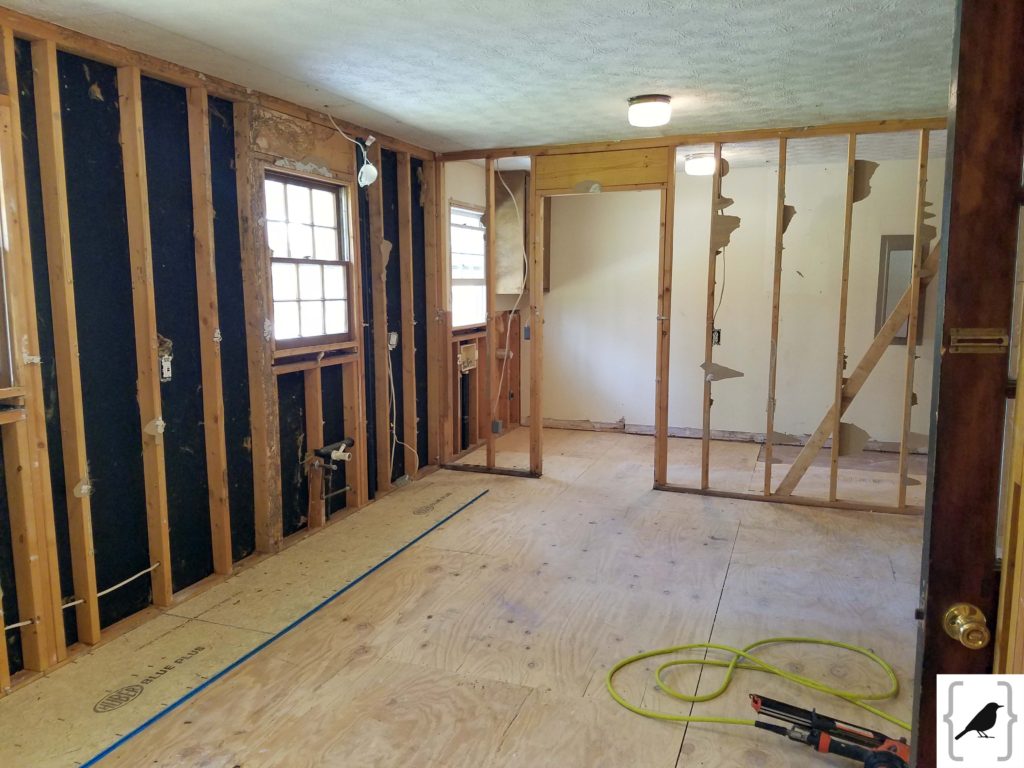
Alrighty… moving right along… all the walls are down… all the termite “art work” is treated and scoped for repair/replacement and the new subfloor is in so we can walk through the space and try to get our heads on straight!
So, let’s pause right here. The plan was to gut the kitchen.. not to increase the size {which meant the kitchen would be about 1/2 the size as our old kitchen but I was willing to give it a go and get really creative with our cabinets and storage options…challenge accepted}… but as you may recall I told you a bit about these unwelcomed termites in my very first post about our renovation. We ended up having to dig out a crawl space under the carport which led to an agonozing decision: Stick with current kitchen footprint or close in the carport, double the kitchen size and add an office and mudroom? As you can see this was quite a difficult decision… one that took us roughly .2 seconds to make {and not one that the bank account would agree with or ever recover from}. YES… let’s “go big or go home”…
Literally back to the drawing board. Paper, Pencil, Ruler, ERASER, essential oils diffusing, chocolate… One of the greatest blessings of this renovation was our cabinet guy, Brad from B & S Cabinets! He did an amazing job years ago at our old house building a custom kitchen island, spice cabinet and coffee bar! I am so glad I found his business card {Let’s thank God for that because there is no other explanation how I came across it} and was so excited to see that his shop was literally 5 miles from our new home! Thank you Jesus for the blessings you sprinkled in to this otherwise disasterous renovation!
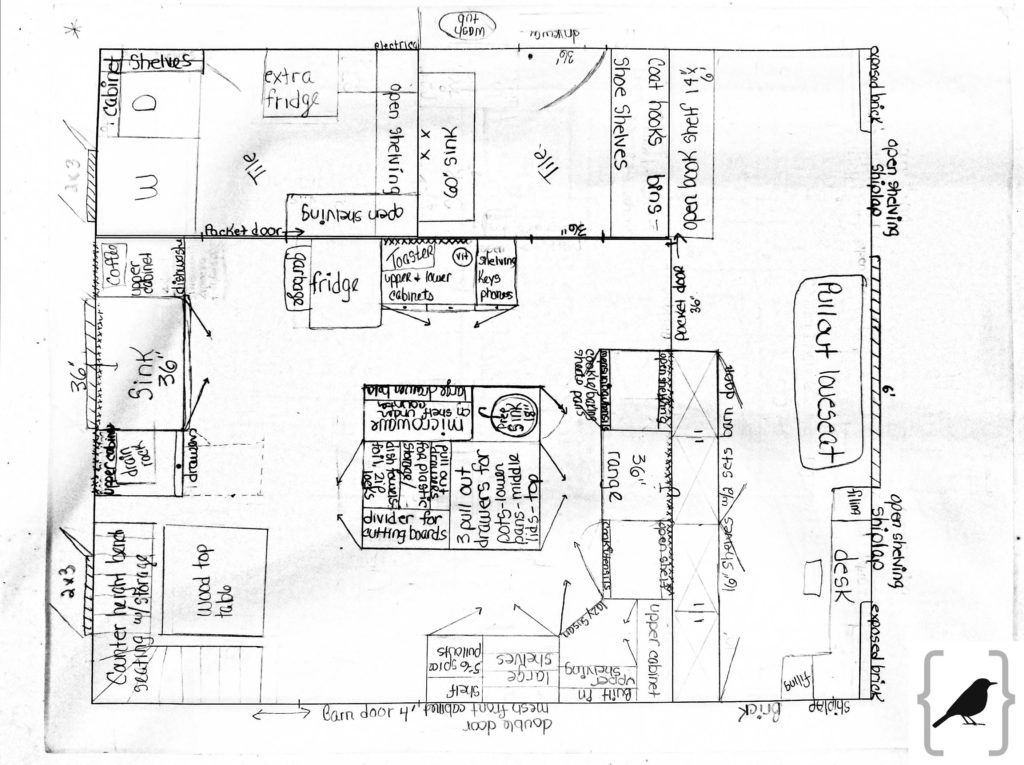
I never in a million years would have thought I would have the opportunity to design my dream kitchen… like never, ever, ever… NEVER… and while I am sure the previously planned space would have worked… the thought of having a nearly 400sf kitchen and my very first pantry, laundry room & mudroom just blew my mind and made me giddy! There were many features of our old kitchen that I really loved; the way certain cabinets were organized, pull outs, spice area, etc, so I literally sat with my eyes shut bringing to mind each and every cabinet and drawer and counter area and what the content was. For each of those I would then ask…did I want to recreate the same thing or what could I do to make it more functional? Where did I want vertical dividers, pullouts, drawers or cabinets, open shelving, cubbies, etc. and what exactly would go in each of those areas {unpacking is so much easier when you have created a space already knowing where everything is going!}. Where would the appliances go? How did I want the kitchen to flow given we’d be entering the house through the nearby mudroom. Would the person making coffee in the morning be bumping in to the person getting the OJ out of the fridge or would the person cooking up their eggs be bumping in to the person unloading the dishwasher or standing at the island doing some food prep? The. struggle. is. real. folks!
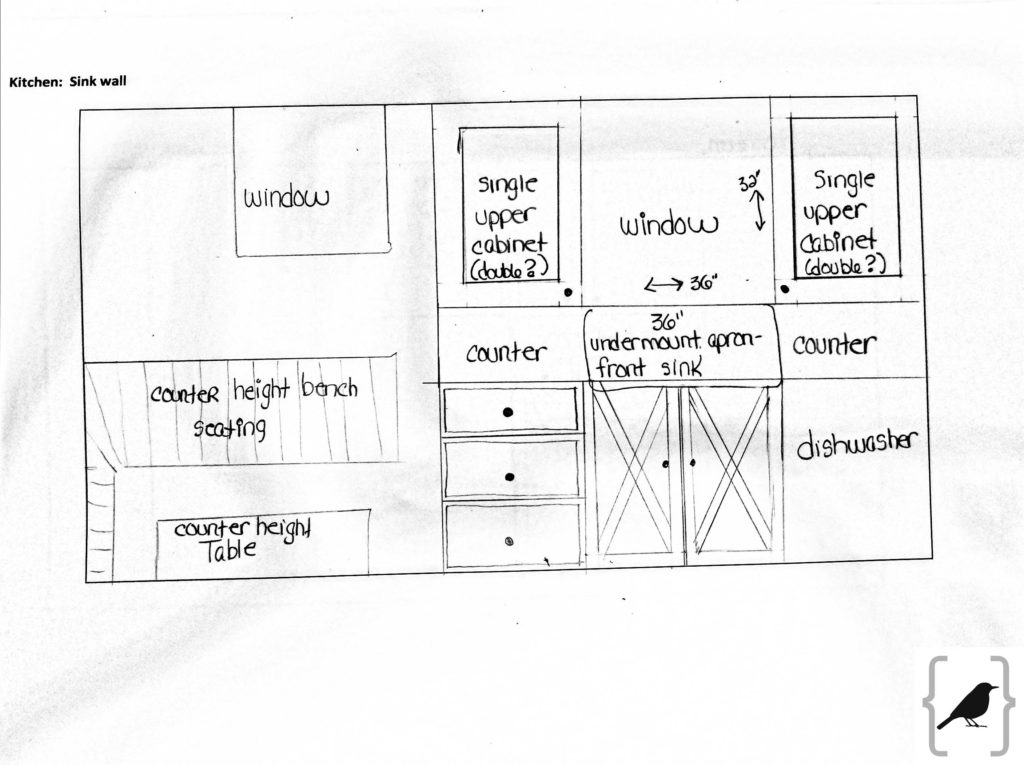
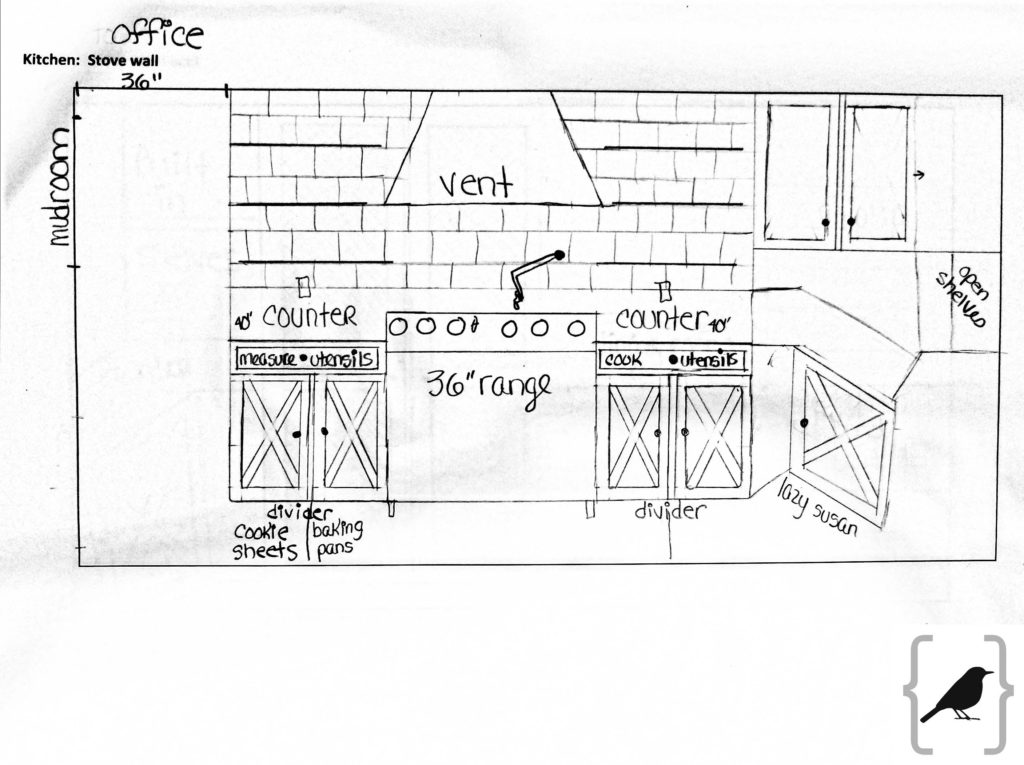
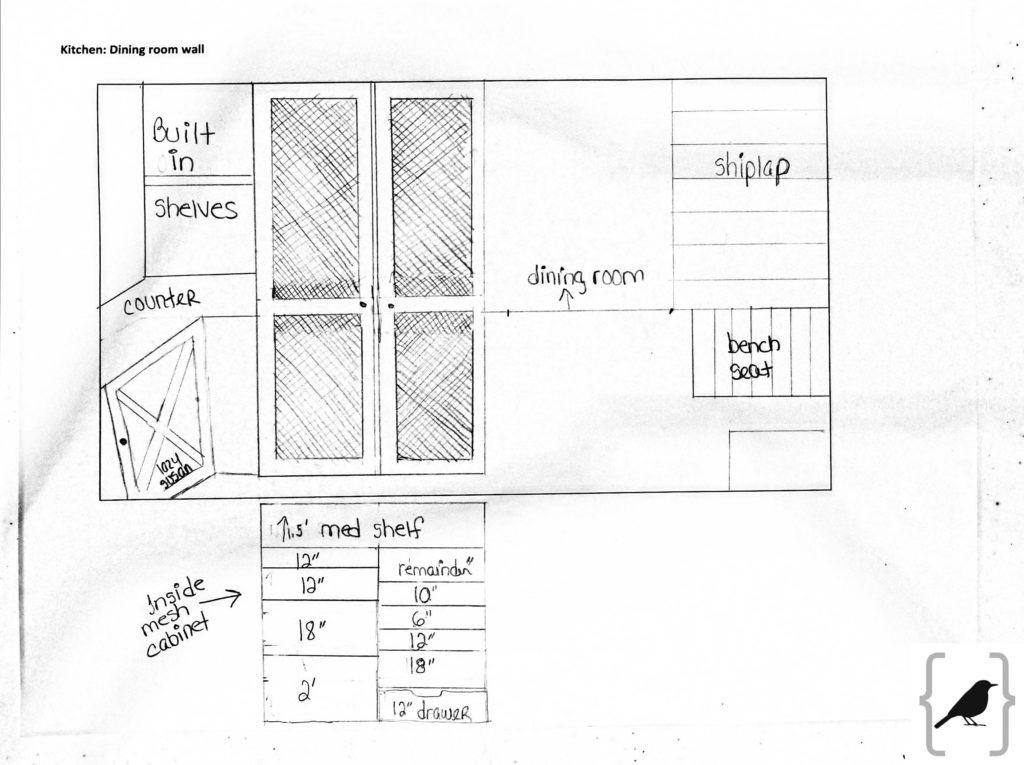
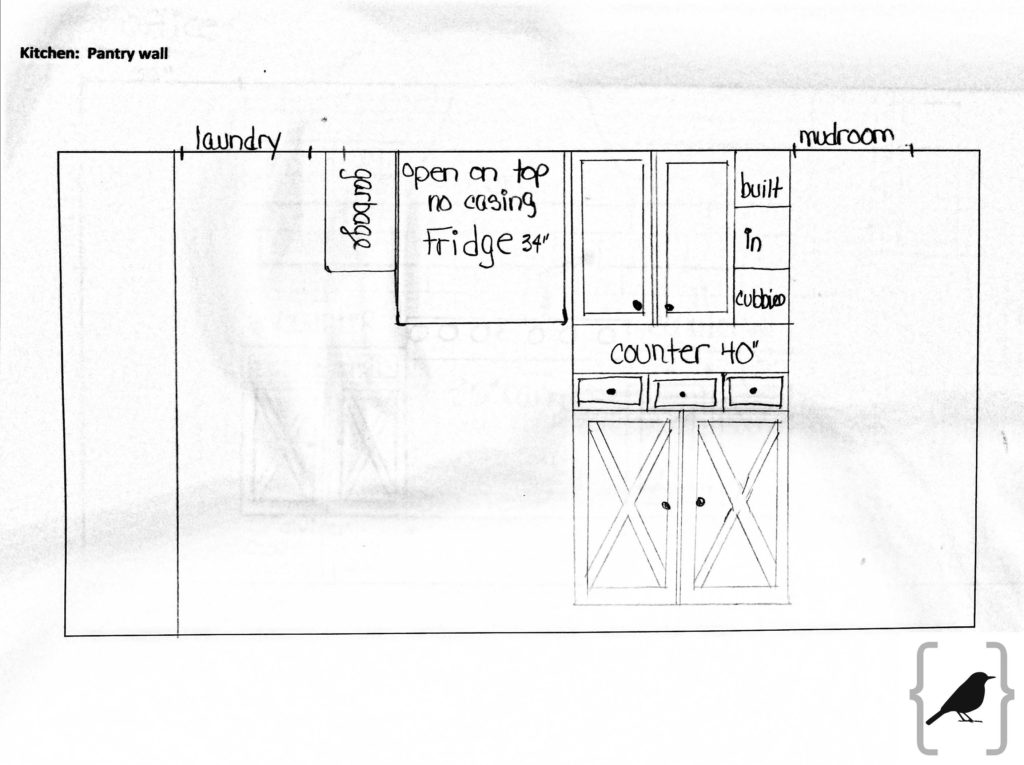
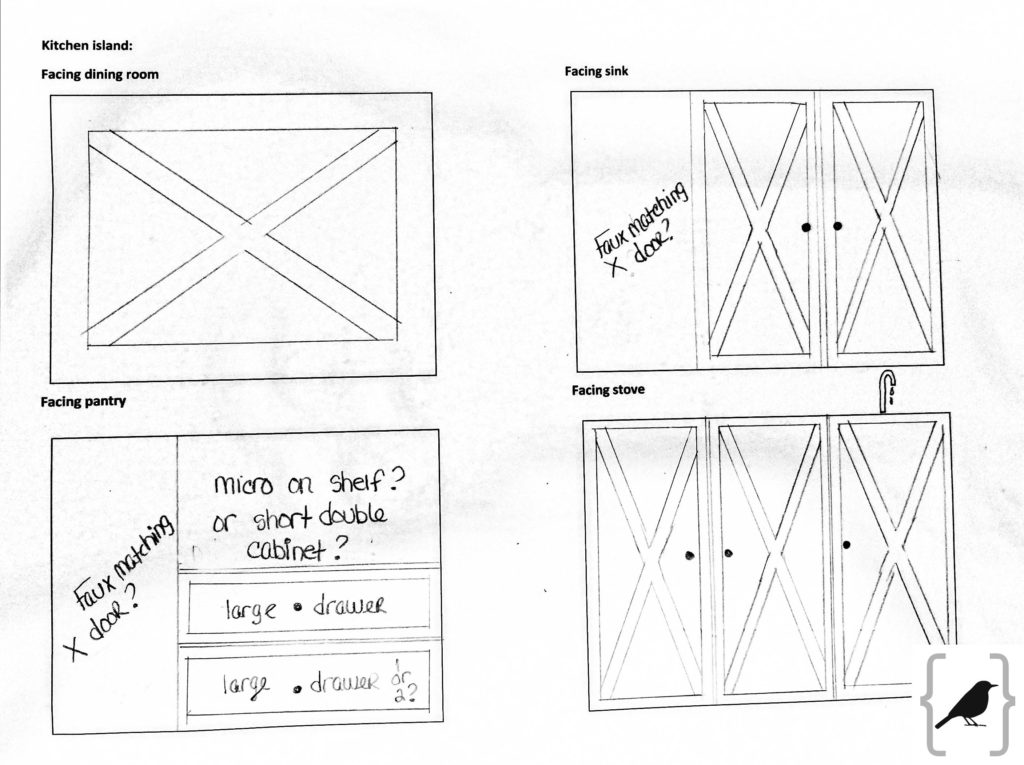
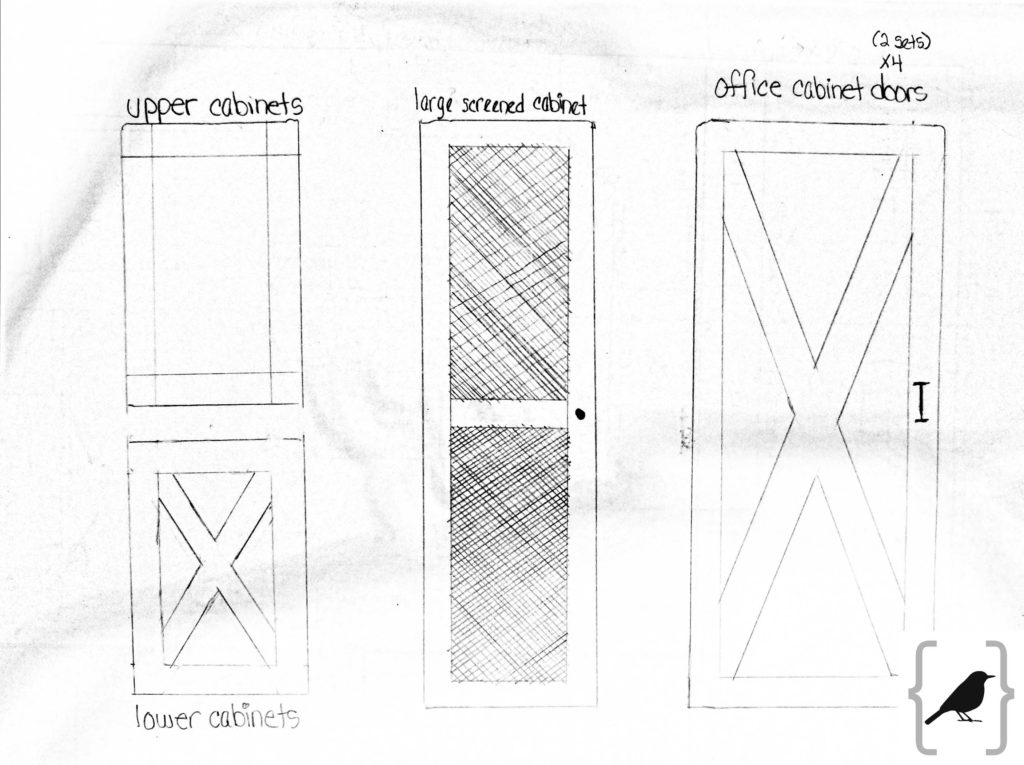
Now you can laugh at my attempt to sketch out floor plans and cabinet designs… What is actually amazing about them is that my cabinet crew was able to take them and bring them all to LIFE! It was like magic!
overall layout
Sink wall
Stove wall
Spice cabinet wall
Fridge wall
Island design
Cabinet designs
Ok, now that the tear~out is done, we have safe floors to walk on, the ceiling came down {I’m sorry I forgot to mention the moist deterioriated insulation in the attic and drywall on the ceiling so that all came down too}, the basics are framed and we can start moving forward… {oh, did I mention that we’ve now determined the ENTIRE HOUSE needs to be replumbed and rewired?… just a minor $10,000 detail}… moving right along…
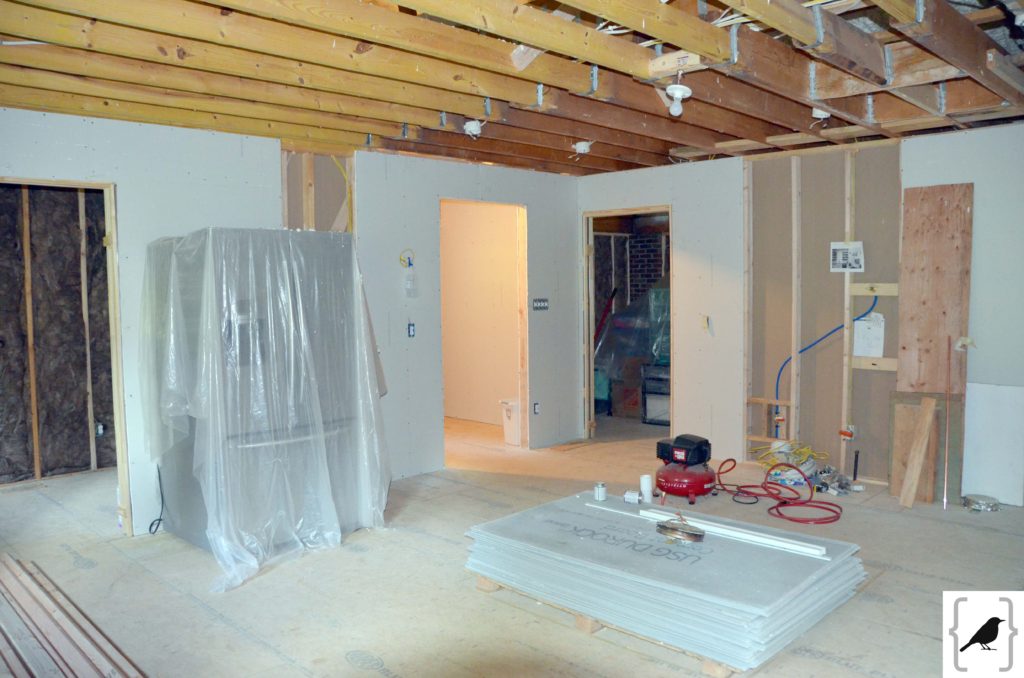
My new office is to the left… YES… there was brick behind the drywall! Straight ahead is the great room… we moved that opening over a bit to the left and widened it since we got rid of the old basement staircase to hell.
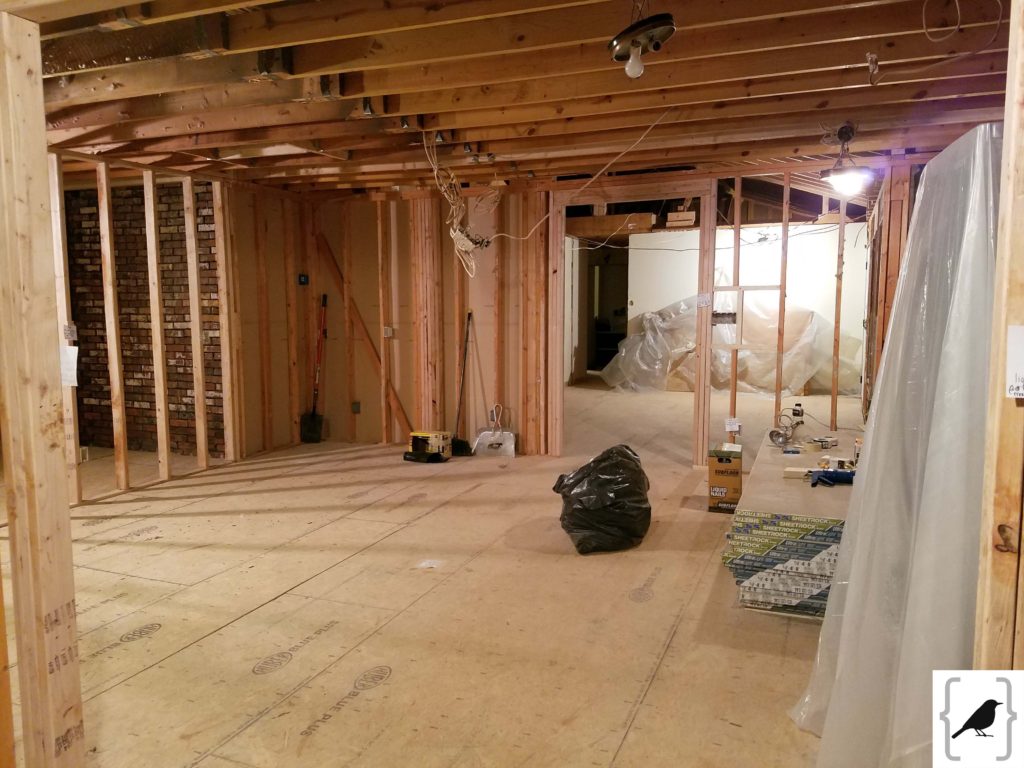
From the dining room looking in the pantry/laundry room is straight ahead left, mudroom straight ahead and office all along the right.
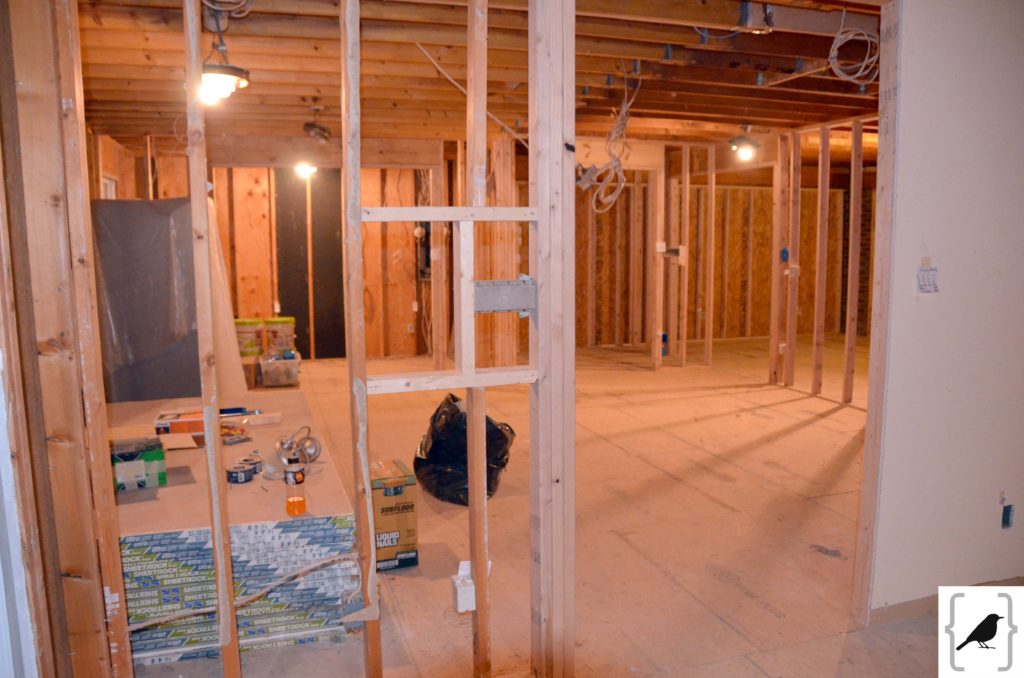
This is the front of the house and where the kitchen sink will look out to. We had already had these plans in place before realizing that all the plumbing was getting torn out so we decided to stick with this layout rather than move the kitchen to overlook the backyard and let my office have the view {kind of feels like I am getting a promotion}.
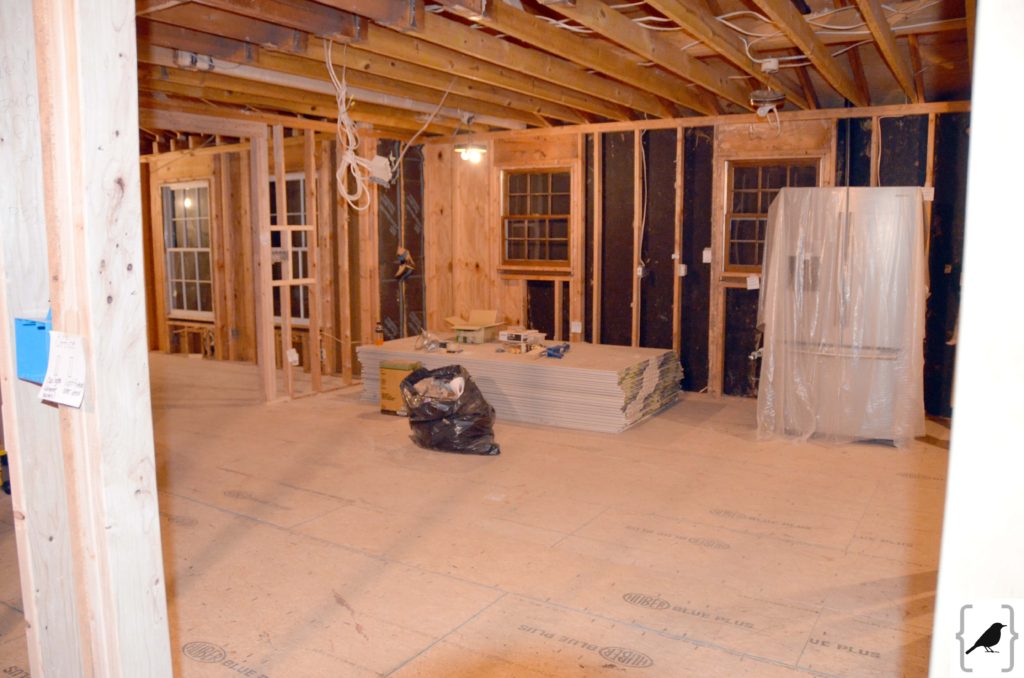
I mentioned the staircase a few pics ago.. but here is a closer look… remember this was the staircase of death {so steep it was more like a ladder!} and was moved down near the master bedroom. In the original plan {where we weren’t making the kitchen bigger} this would have become a half bath or additional pantry storage.
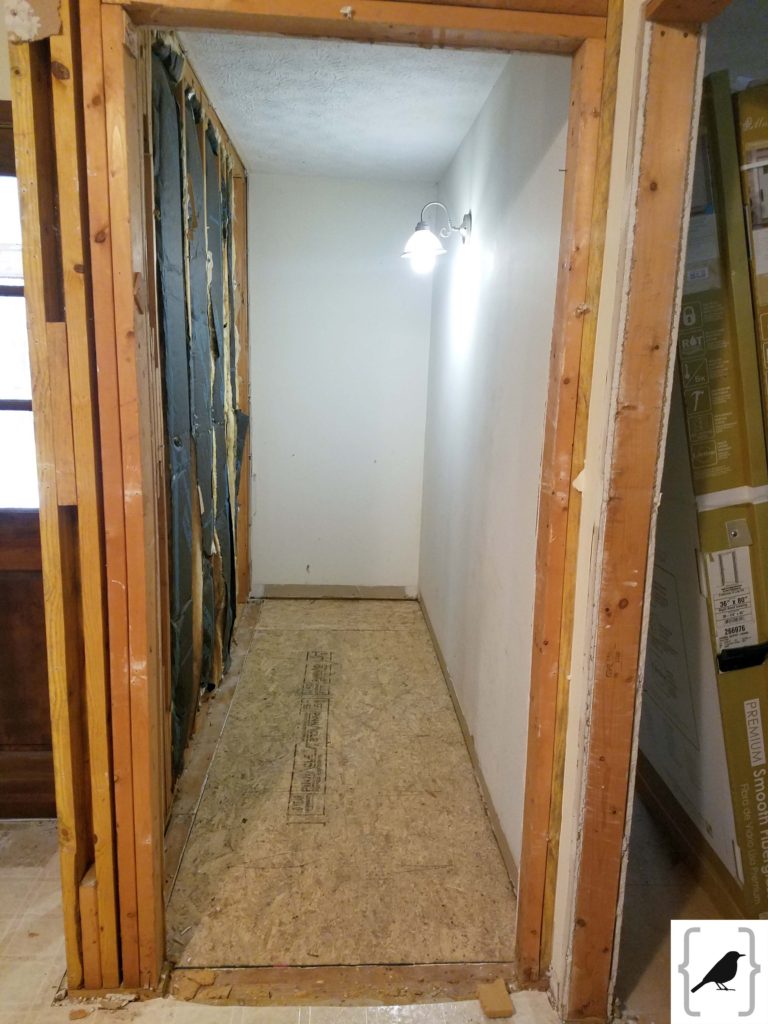
Drywall and Durock are delivered so walls can start going up…but first the insulation was blown in to the attic and batting put in the exterior walls. Boy did we want to spray foam the entire house but it’s so much $$$.
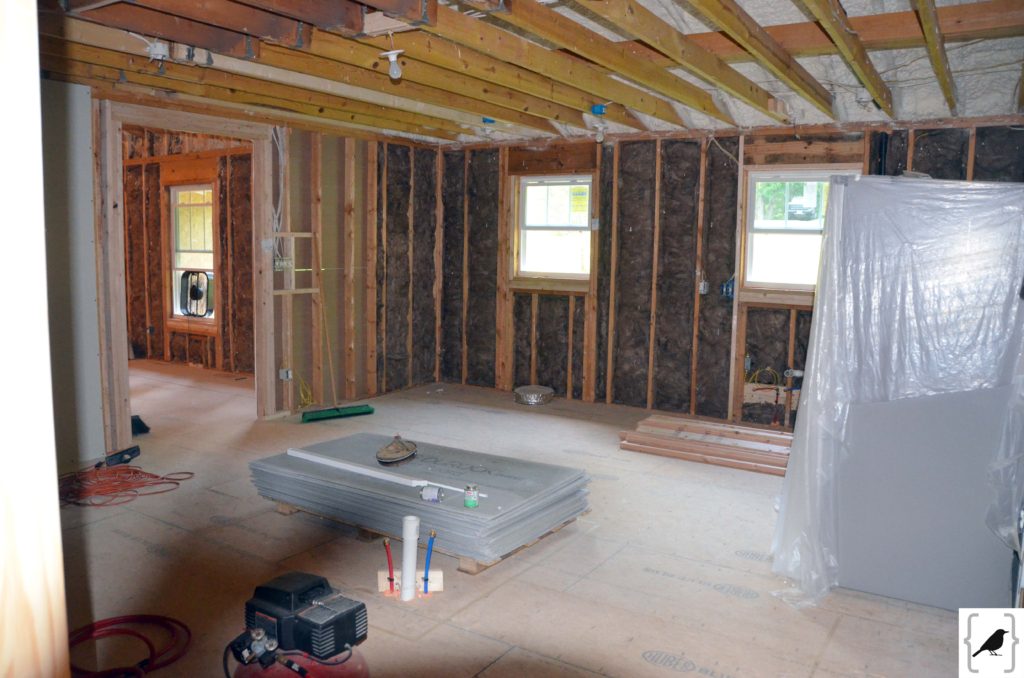
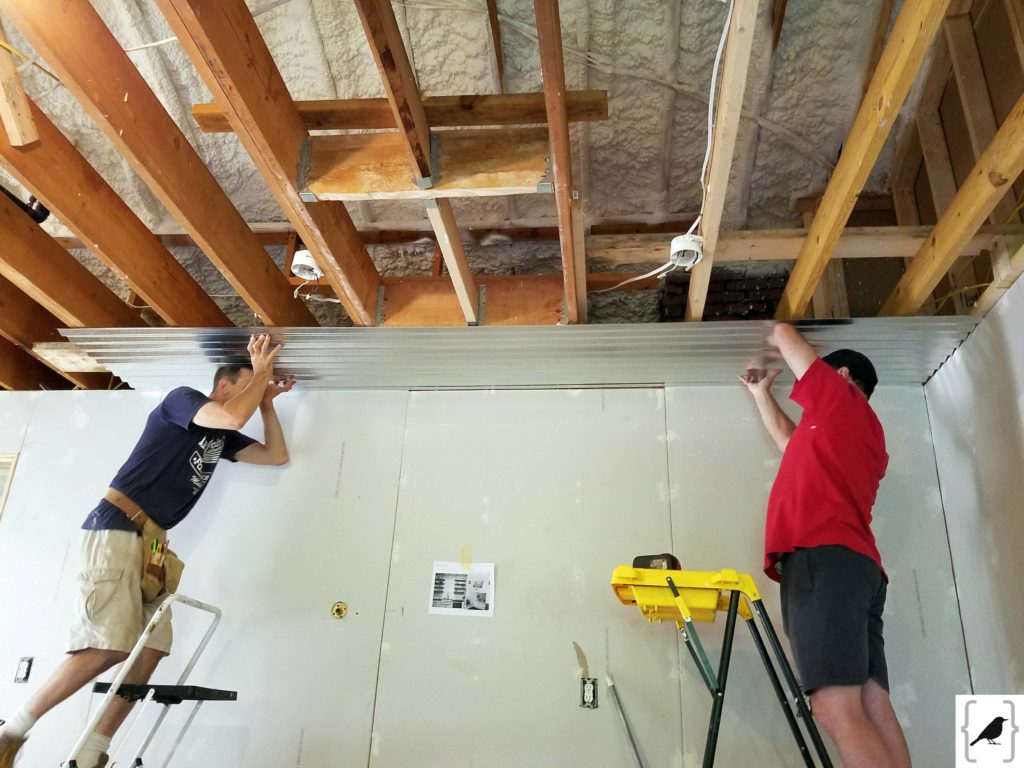
So excited about these corrugated aluminum ceilings!!! Hubby and our awesome long time friend, Mark, {we adopted our daughters together in Guatemala} tackled this which was about a 10 hour day… It was QUITE the learning curve and in hindsight we should have done the master bedroom first so we could have learned the best way to hang this stuff in an area that everyone wouldn’t see! Live and learn and just call every mistake “Character“… that was our new motto!
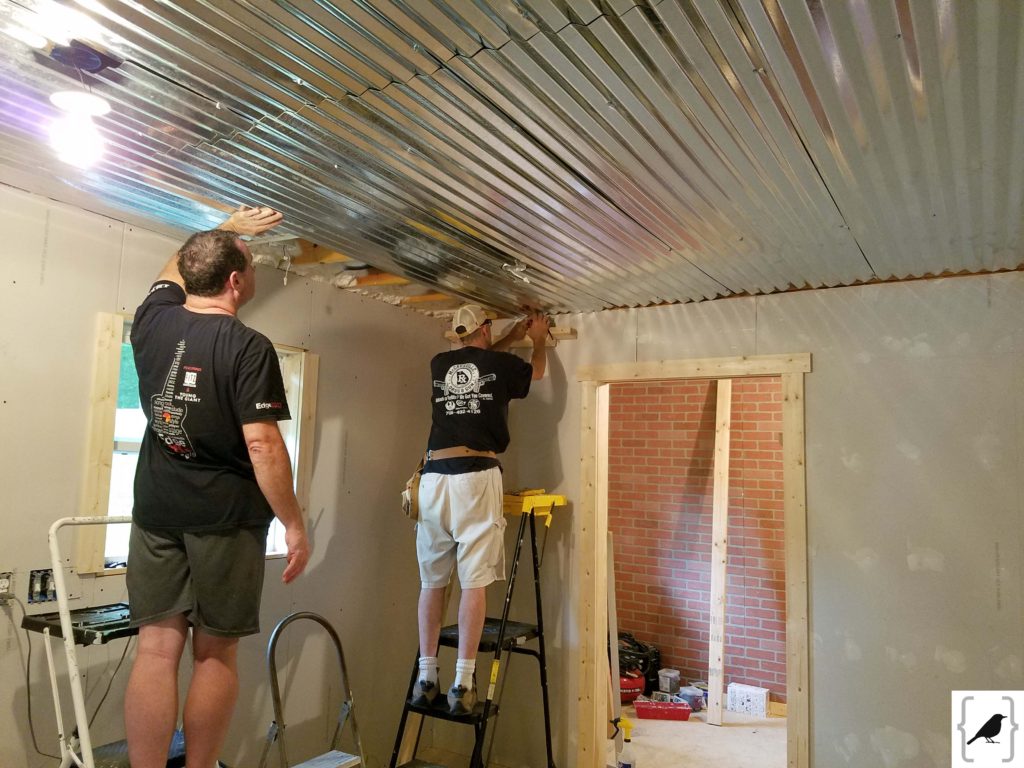
Ain’t it cool! Of course the room isn’t squared so we ended up with some unexpected gaps that required ingenuity in the form of roof flashing and trim we never planned to put up! That was another few days of work and lots of nail biting and possibly some offensive language.
Today… today it is starting to look like a room! clearing out a bunch of construction debris and vacuuming the subfloors reallly freshened up the space, don’t ya think? {in this pic you can also see the brick paneling from the pantry renovation… we painted it white and it seriously looks like real brick!}
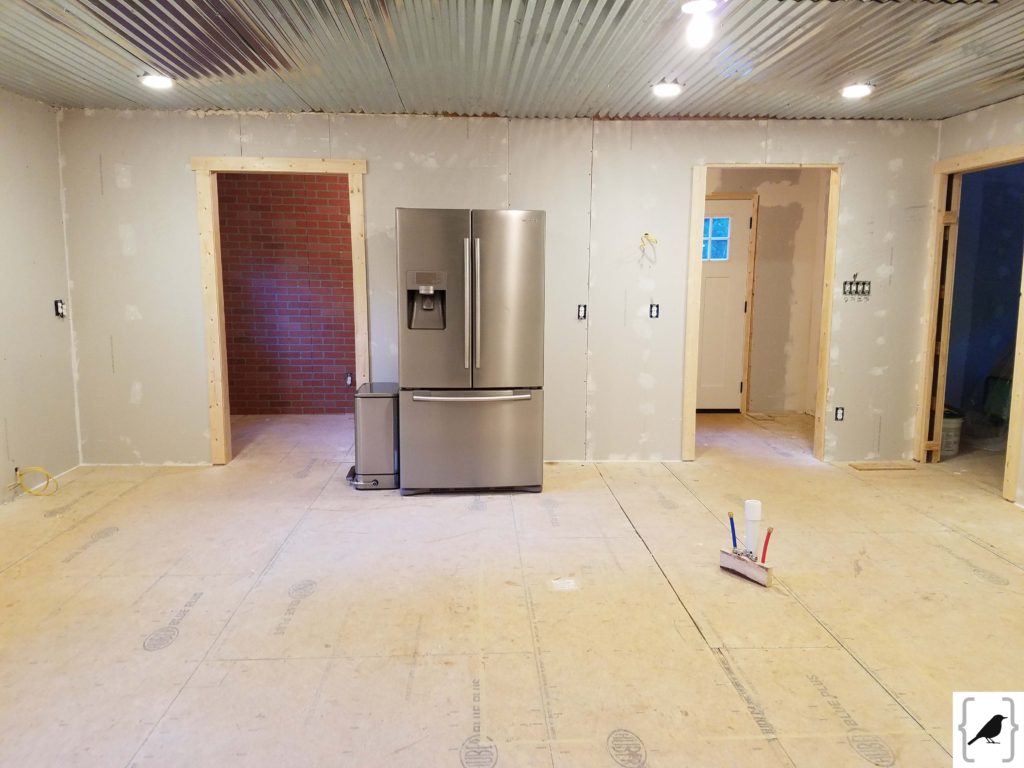
Side note… we had a note on the fridge for the contractors not to unplug it {it was empty besides drinks} but they did unplug it and by the time we figured that out the entire inside of the fridge was moldy! Dear Lord was it an incredibly tedious task for hubby to tackle… looked brand new which was great and I guess it never would have gotten a deep cleaning like that otherwise. See how I look at the bright side?
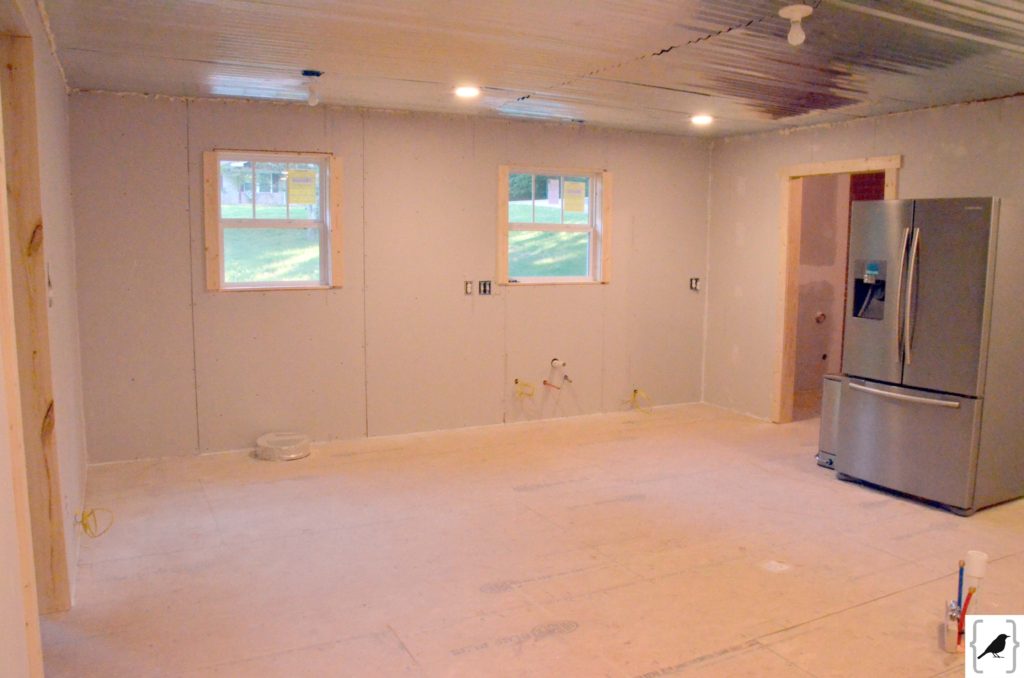
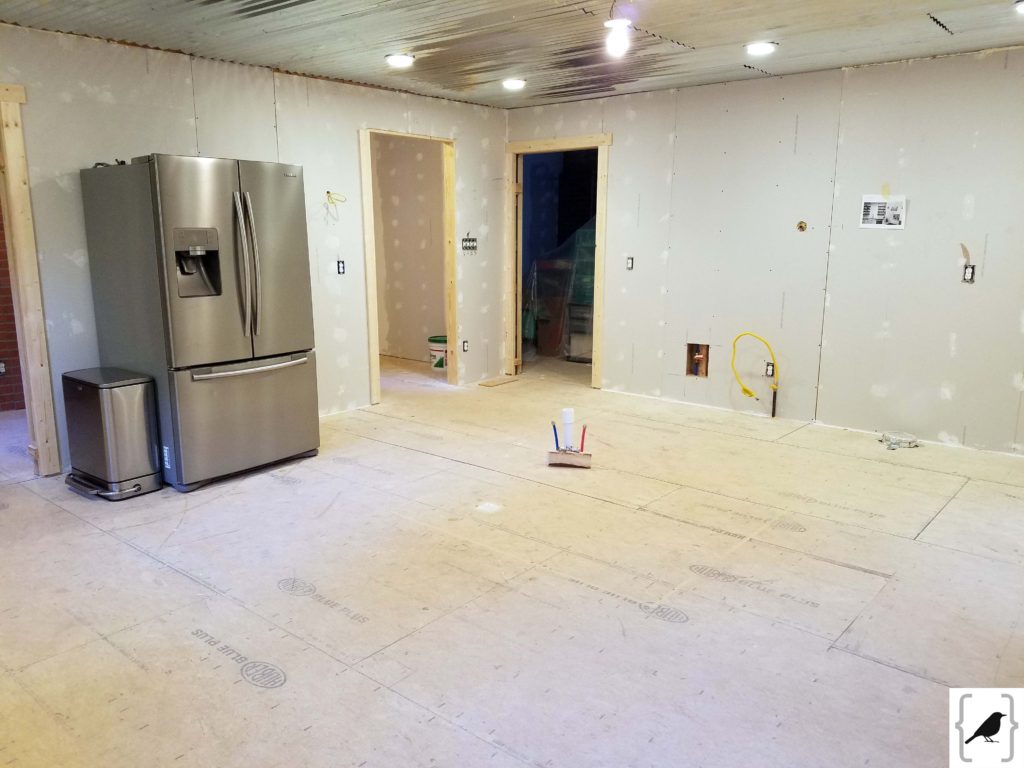
My new office is the door on the right {that blog post will likely take another year because it’s still not totally unpacked}. It will be great being right off the kitchen.
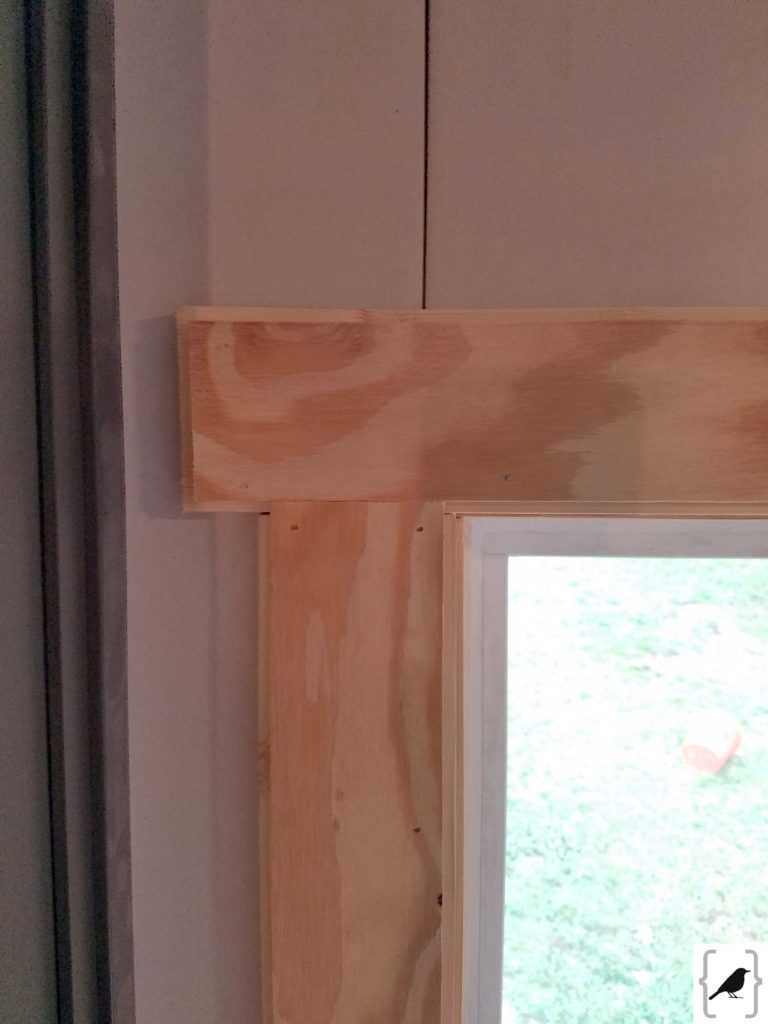
Trim work. not. my. favorite. by any stretch of the imagination. It’s not hard, but it’s so time consuming and since drywall was put a few places it wasn’t supposed to be then the shiplap was put on, it made the shiplap and the trim the same depth as each other so you could barely tell one from the other!!!!! Ug! So I had to create a smaller trim on top of the regular trim {kind of like a shadowbox effect}. Thankfully this just happened in the kitchen! I’ve actually become a nationally ranked nail gun champion btw!
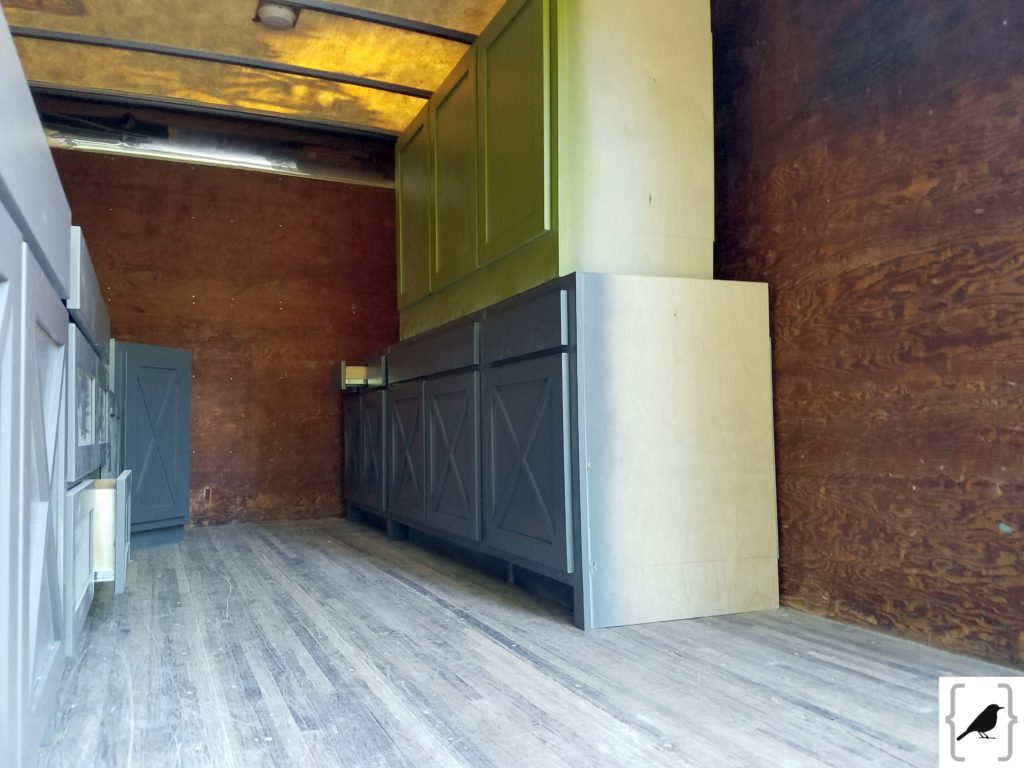
Now if there was a day to get excited… today was it… the truck arrived with the cabinets!!!!!!!!!!!! There are not enough exclamation marks to adequately express how I felt so I will spare you my deep desire to hold that key down for about an hour!!! {see, I just did 3 of them! … ok, 4 of them}.
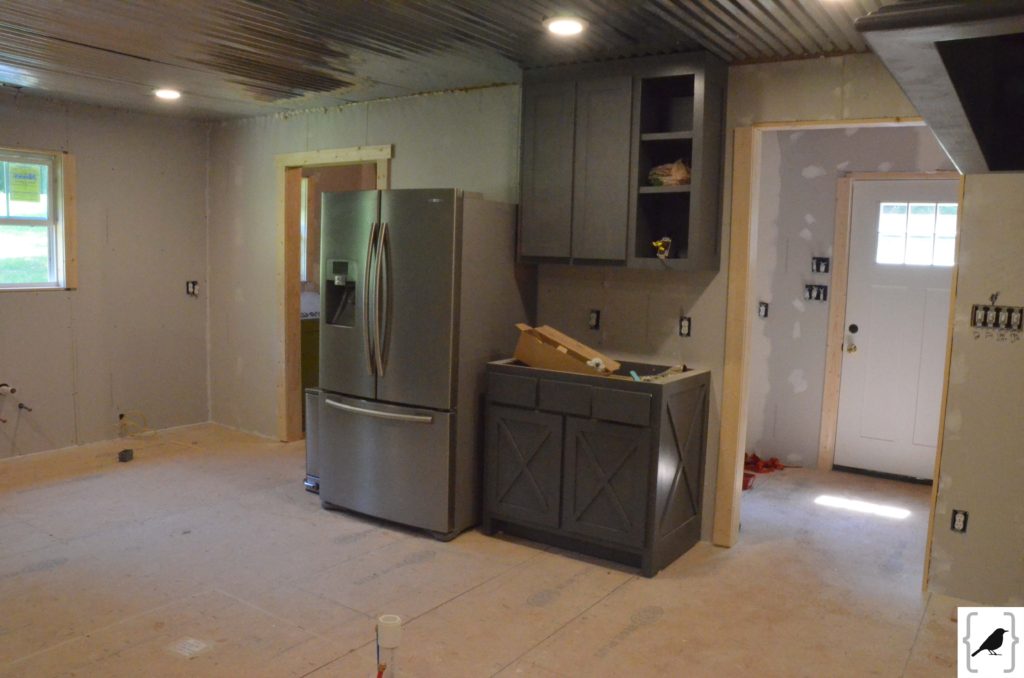
It’s starting to look like a kitchen… finally taking shape. Love these little cubbies as the bottom one will have built in USB plugs so hubby can stuff all his junk in there and charge his phone {you see I am being optimistic that there won’t be a pile on the beautiful new counters}.
Let’s take a side trip before you see how this all comes together. White… ALL WHITE farmhouse style kitchens are “in”. And they are beautiful…but they aren’t “me”. I’ve always been someone who goes against the grain and against trends in many ways, always looking for a way to give something a unique twist and make it truly one of a kind. While I wanted something reminiscent of a farm house with some of the chosen elements {because what’s not to love about farmhouses?}, I also wanted something timeless…something with a touch of “industrial” and a touch of “unexpected”.
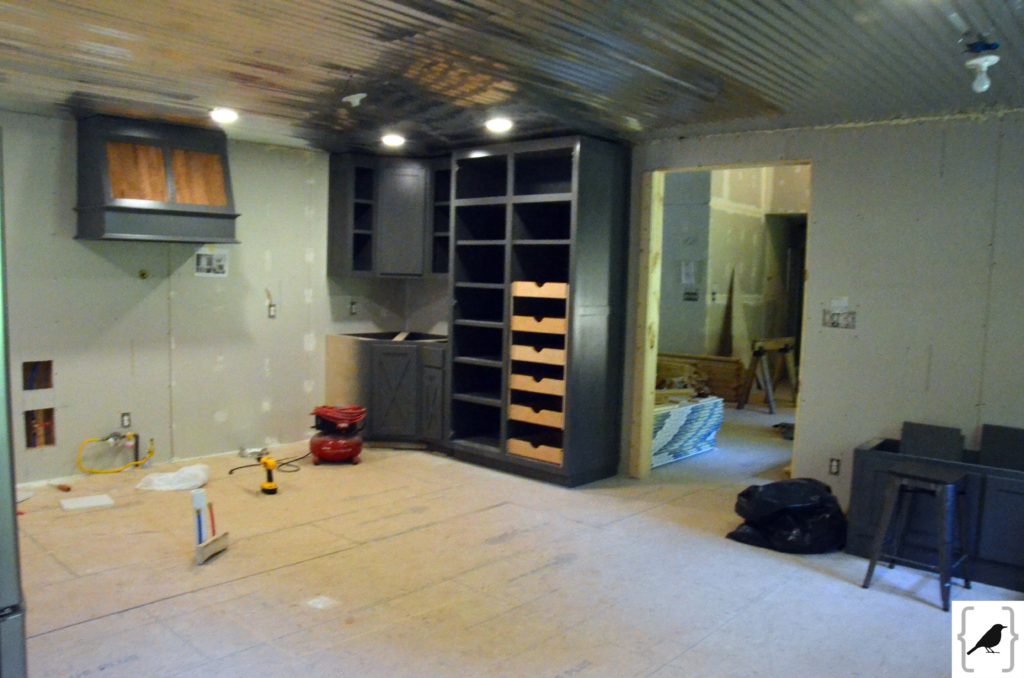
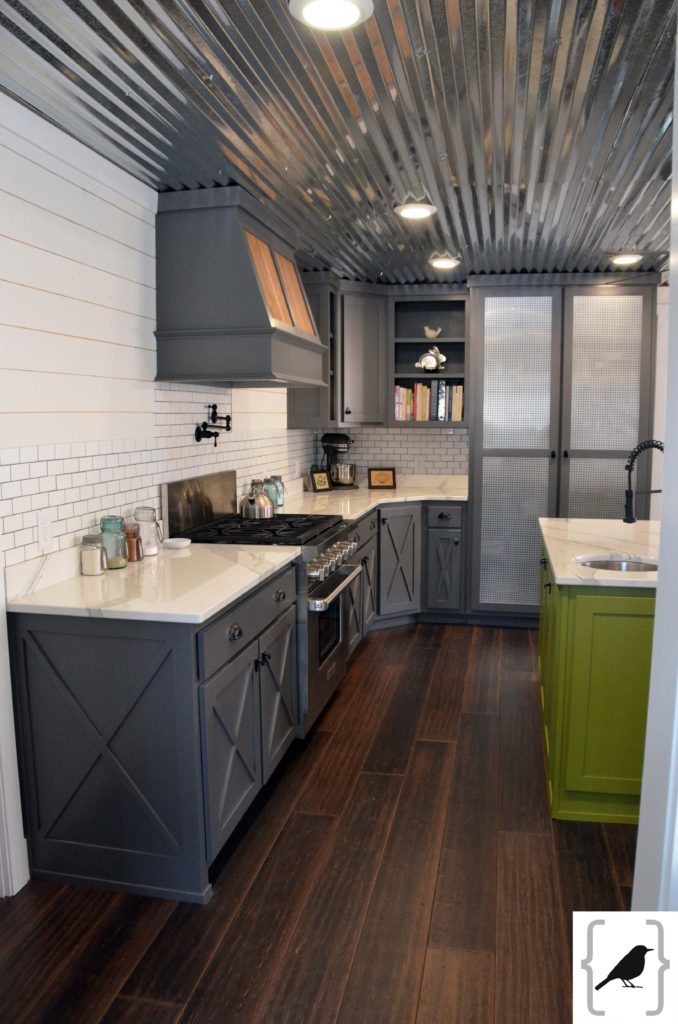
And then the angels started to sing as the vent hood was mounted to the wall and my huge spice/storage cabinet was installed! I also didn’t really have any great desire for a Lazy Susan but it was the only logical option for the corner area and it turned out to be fantastic and huge. So, that vent hood… one thing that I really wanted to do was incorporate touches of barnwood and other findings from our barn scavenger hunt so it made my heart happy to see this piece put up! Do you remember how we also used some items from that ol’ barn/homestead in the mudroom? Back on track… the spice cabinet has the drawers spaced the exact measurements I requested for different bottles of things like oil & vinegars, baking items, spices, mason jars, etc. Custom cabinets rock!!! Did I mention I LOVE our cabinet guys?
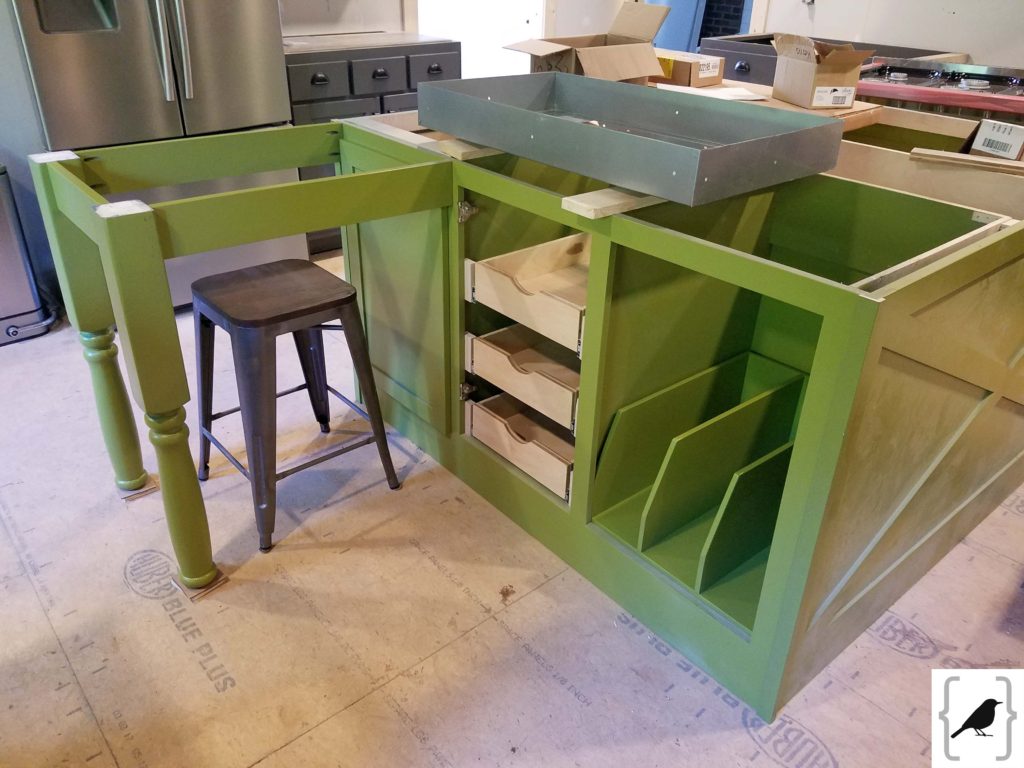
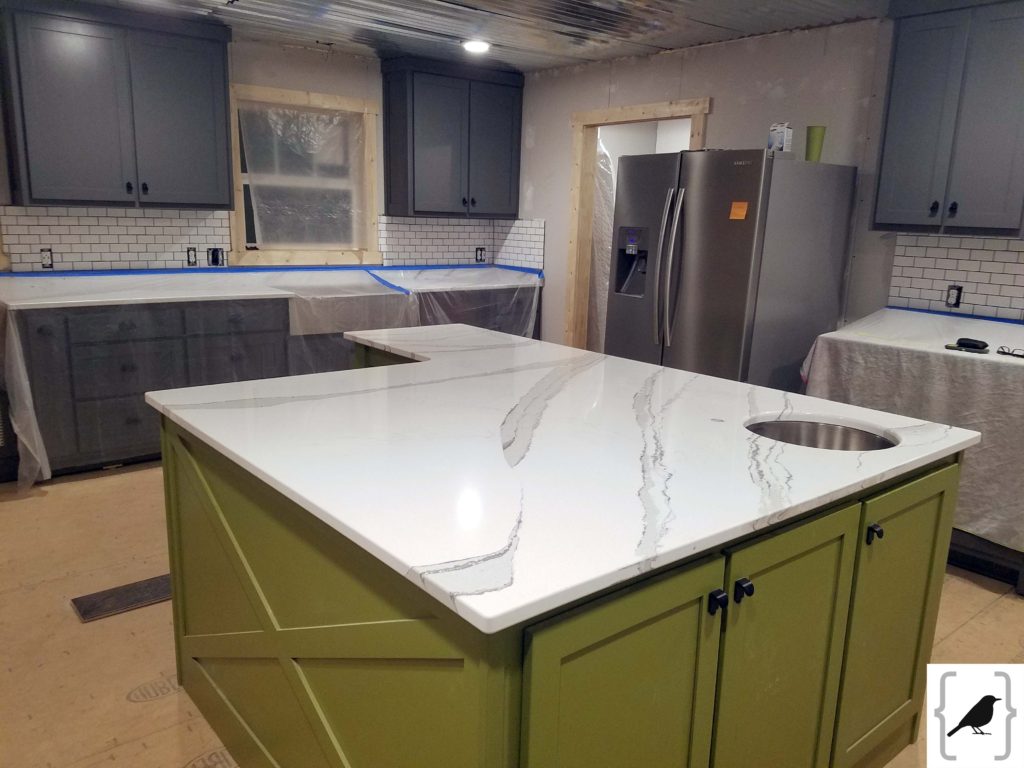
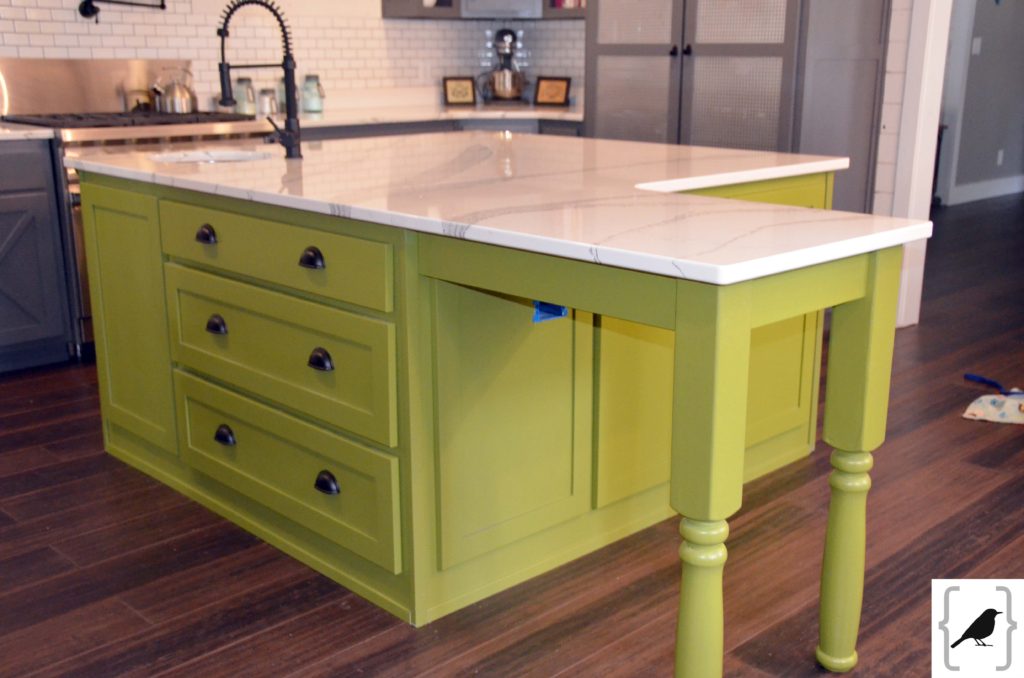
My GREEN KITCHEN ISLAND {cabinet guy said this was a first!}. It’s my favorite color green {Sherwin Williams Verdant} and it is THE only splash of color for the house and I am just tickled pink {or green} over it! {the legs on the seating section of the island were off the well pump house at the homestead!}. Look at the pullouts for all my tupperware and the vertical dividers for my cutting boards. “A place for everything and everything in it’s place”.
Oh my gosh… I love the hardware! We did “finger pulls” for all the cabinets. I discovered them at build.com and thought they were really unique. Apparently, the drawer pulls were an absolute bear for the cabinet crew but we’ll just call it skill building! It’s hard to see the pattern, but the front of the storage/spice cabinet is stainless steel punched tin in a clover leaf pattern! I didn’t want some trendy chicken wire or glass… I wanted something unique and reminiscent of an old pie chest. Thankful to Brad, the #1 cabinet guy, for sourcing out exactly what I had envisioned! He even used the punched tin on the front of the air conditioner return in the built in seating instead of some ugly ol’ grate! A+ for creativity there!
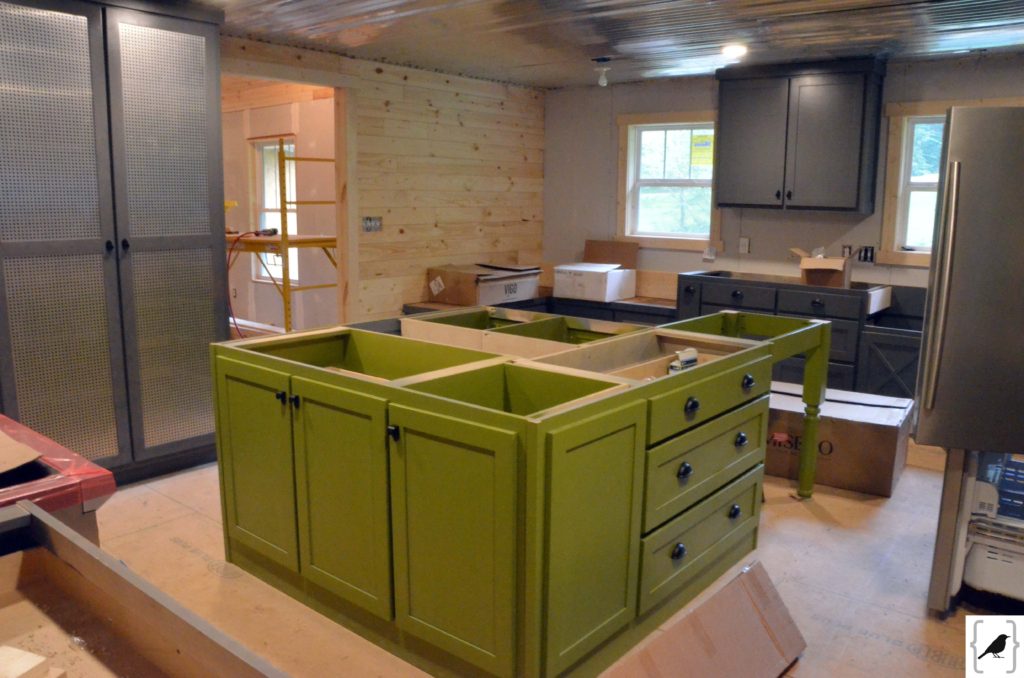
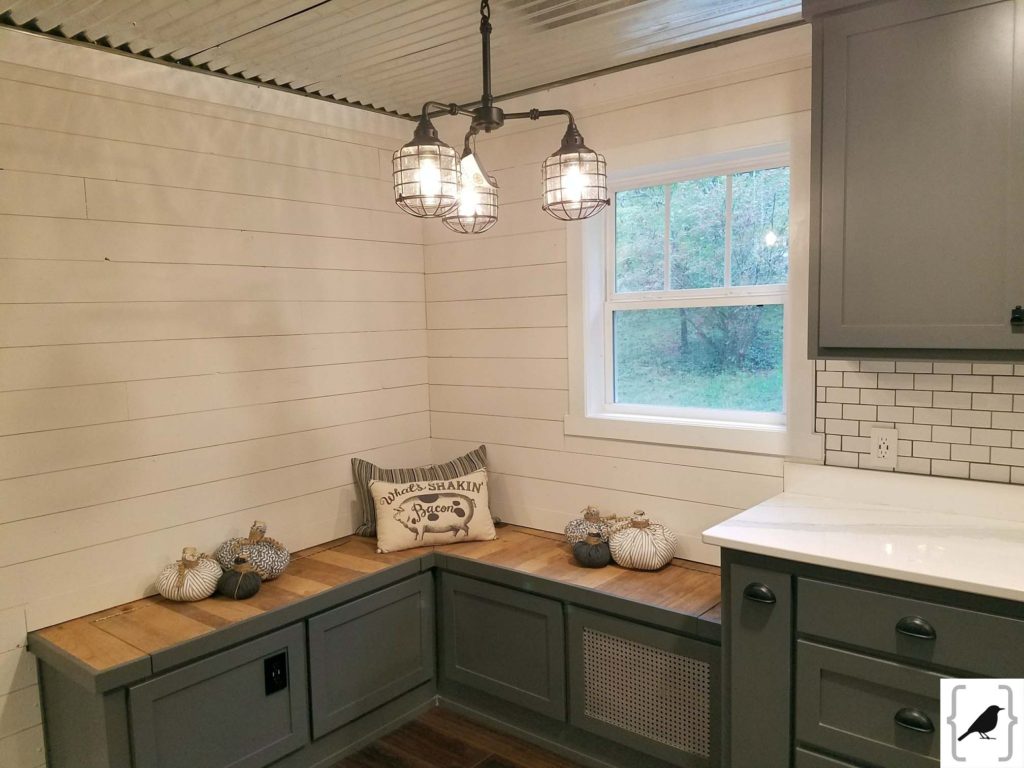
I have also come in second place at the world championship for shiplap installation {only second to Chip & Joanna Gaines, of course}. This stuff is actually easy to hang. The only trick is creating shims so you can get the gap that you want {we did nickel thickness} so you do need a second pair of hands for longer walls. The only reason I learned how to use the chop saw and nail gun was because hubby was traveling so much and nothing was getting done while he was gone. I was getting frustrated and decided I better poop or get off the pot. It really gave me a sense of accomplishment and some new life skills and if we had just bought an 18 wheeler full of shiplap instead of messing with ANY drywall in the house we probably could have moved in 3 months early {no joke}! Let me also take a step back and tell you how much we have always loved shiplap… long before it became trendy… there is just something about seeing old farmhouses with their interior walls of shiplap… it just takes you back… it’s inviting… and it’s comforting to me for some reason….. And, LOOK, see the built in bench with the barnwood slat top? Yep, you guessed it… that wood also came from our barn treasure hunt! That bench seating also opens up for storage and has the air conditioning return hidden in it. Genius idea, right?
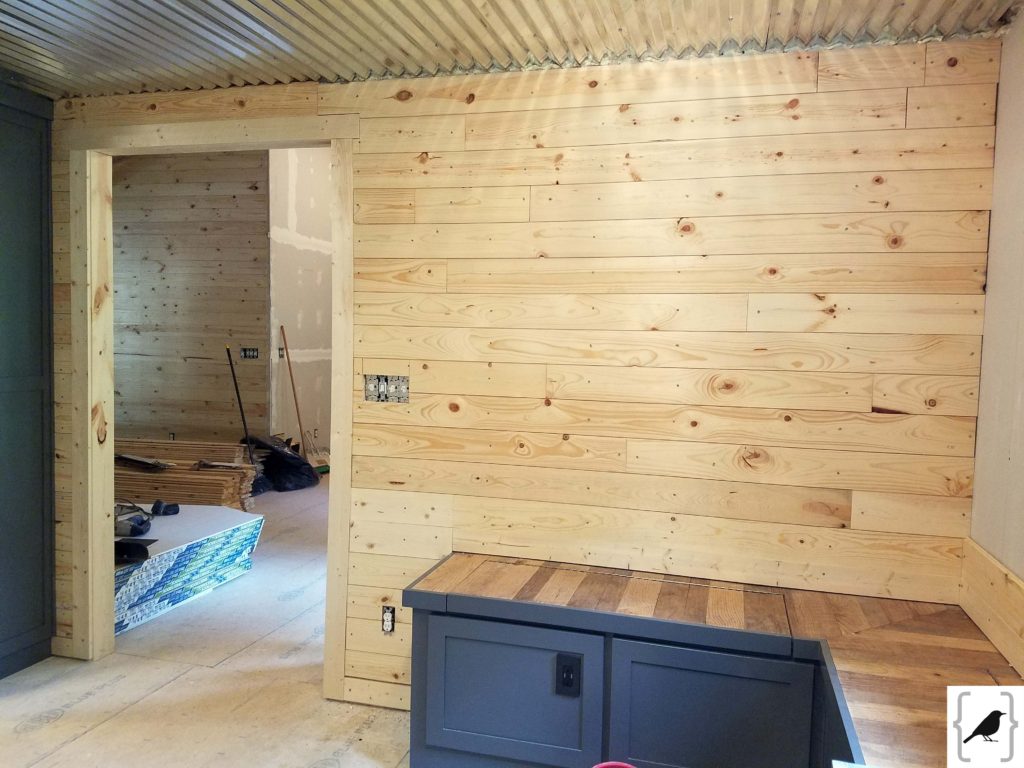
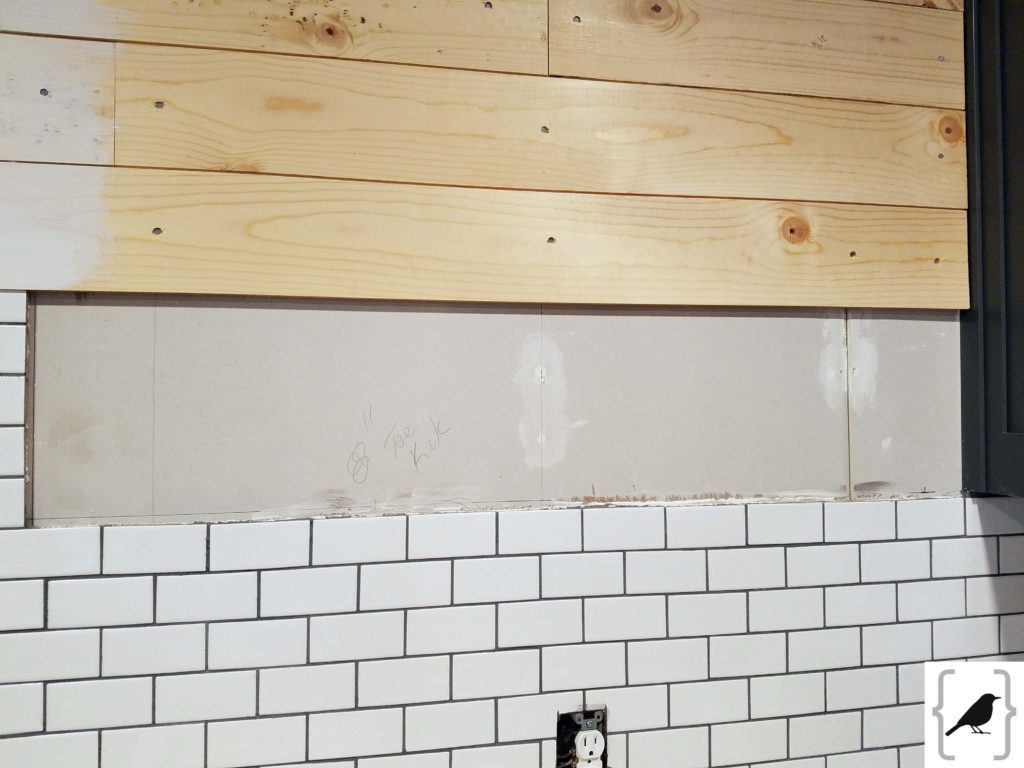
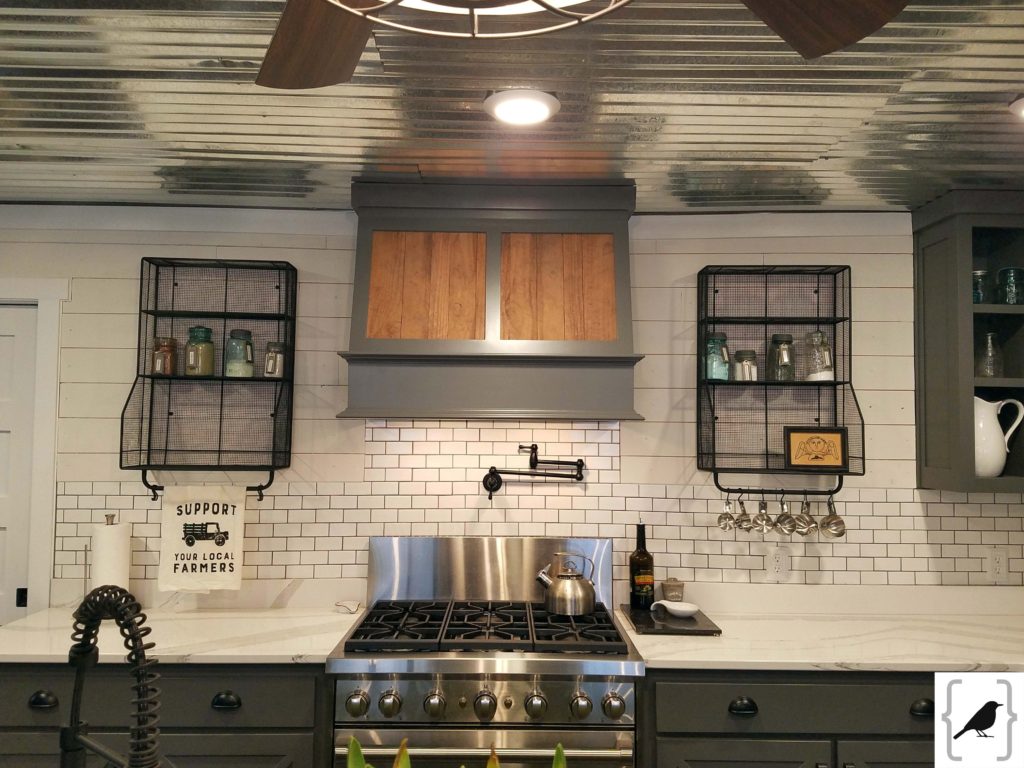
I had been looking at tile for MONTHS…. Every time I thought I had made up my mind, I found something else that I loved more or a different idea popped in my head {normally at 2am}. In the end I really fell in love with going very simple with small mosaic subway tile amd a deep gray grout to compliment the cabinet color (Sherwin Williams Peppercorn). I knew it would be timeless and that no matter how the décor/accessories were changed over the years that it would still be the perfect choice! I was really excited about seeing the wall behind the stove come alive. At first, we were going to do the subway tile all the way up the wall but then I saw an idea on Pinterest {my only Pinterest choice for the house!} to do 2 different materials on that wall. Shiplap & Subway tile were the perfect marriage!
The counters were installed…. the counters were installed! I am thrilled that we took a leap of faith and went with the Cambria white marble collection {Brittanicca} for the entire kitchen! Originally, we were going with a deep gray on the island, but the pattern in the marble was so beautiful {loved the opportunity to see a magnificent display of it at the Cambria showroom} that we knew the island would make a DRAMATIC statement and it. sure. did! Yes, there is a risk with white countertops {i.e. one of my cookbooks bled on it while I was soaking nuts to dehydrate and I about had a heart attack and one of the kids left a cast iron skillet sitting on it and left a ring… 2 heart attacks, but luckily for me and for them, we got the stains out}. So far no issues with coffee or tea stains not coming right up nor any stains from berry juices because supposedly those are the biggest culprits so I’d say so far it’s a win. We had all Cambria surfaces in our old house and loved the material. The maintenance is so simple, no sealing, doesn’t crack like granite and the color pallet is to die for! So, naturally we wanted to use the same materials in the kitchen and baths at our new home. And if I might mention… it looks killer with the subway tile and grout color!
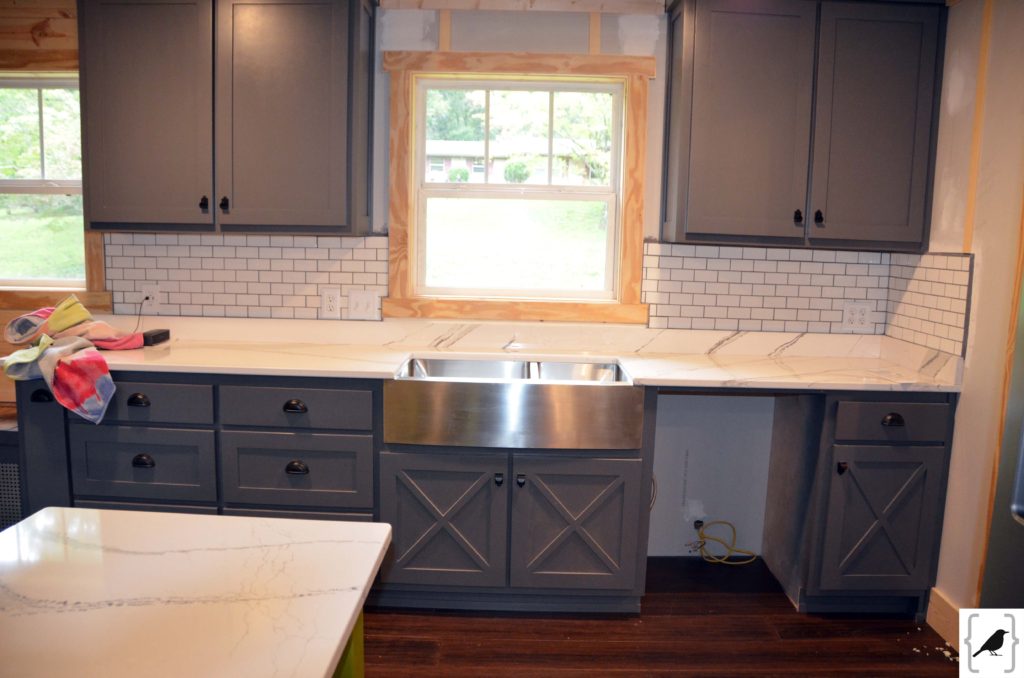
While I thought about going all white with the sinks, I also loved the idea of complimenting the stainless steel appliances and the punched tin spice cabinet doors. With each wall of the kitchen having 1 stainess steel accent {stove, spice cabinet, fridge, sink} it really gave the kitchen a cohesive look and I love the farm/apron front style!
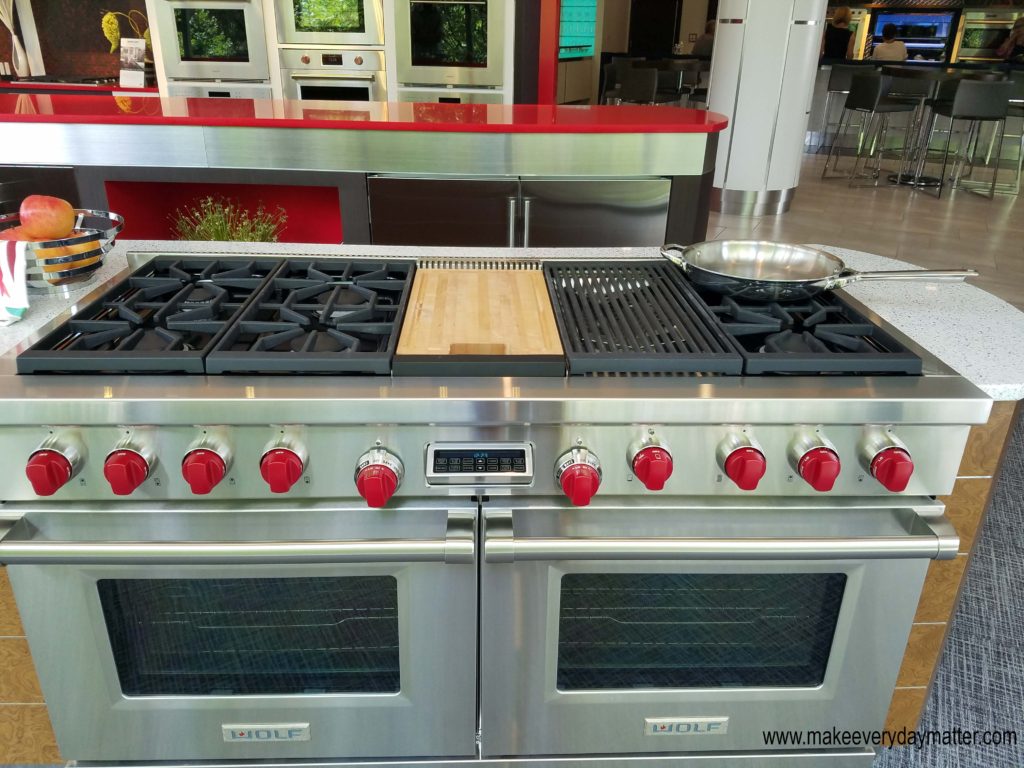
See that big space under the vent hood? Yes, I am waiting on my baby to be delivered! His name is Wolf!
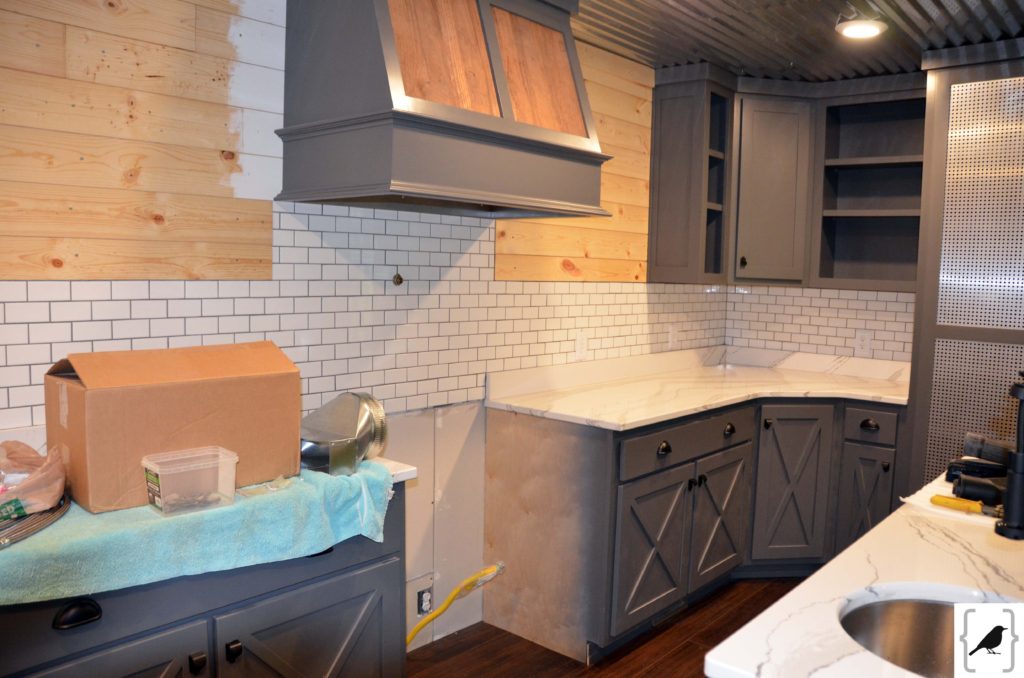
Day by day, bit by bit, piece by piece, sore hands, little sleep…my dream is coming to life! So happy we decided to add on the small seating area at the island. If not there would have been a 7 FOOT space between the kitchen sink and the island. It is a unique touch that also has proven to be probably the busiest square footage of the island being directly across from the fridge!
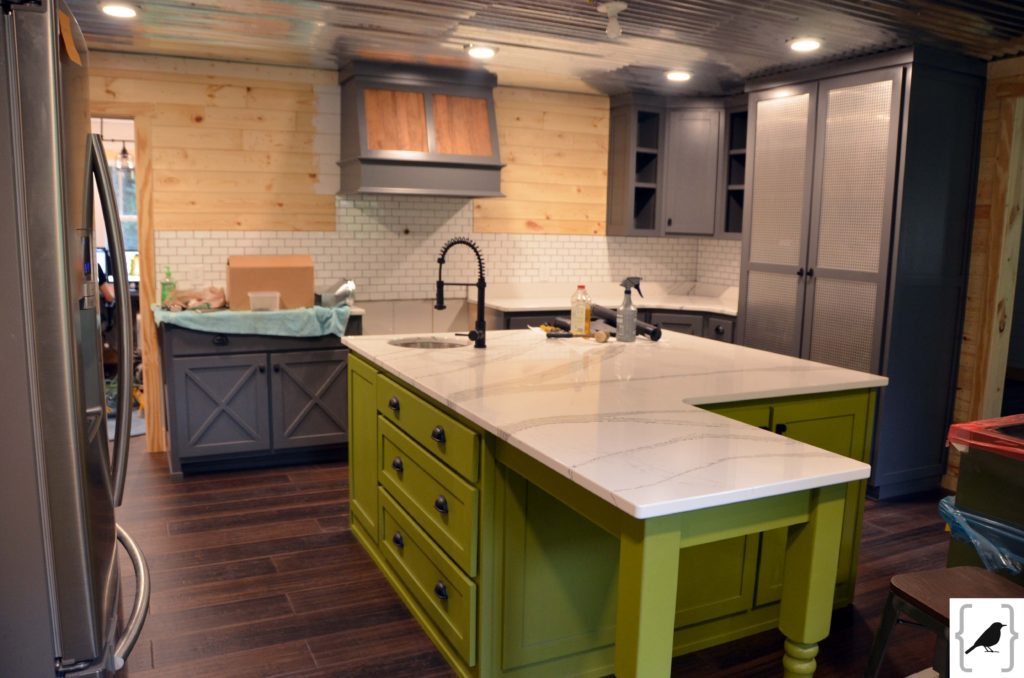
Let’s talk drywall. Let’s talk about how bad it sucks and let’s talk about how impossible it is to get a competent person to actually show up to do the work and let’s talk about how bad hubby and I were at trying to tackle it ourselves when we had exhausted all hired help possibilities! So I was thinking about how we did the battens on the outside of the house and what a unique and complimentary touch it would be to utilize that same design concept inside the house to hide the dreaded drywall seams! BINGO. It worked out beautifully and you will see that they looked like they were planned from the beginning and totally meant to be! {You also caught a glimpse of them in the Master Bedroom and Master Bath and someday will see what we did with them in the Great Room!}
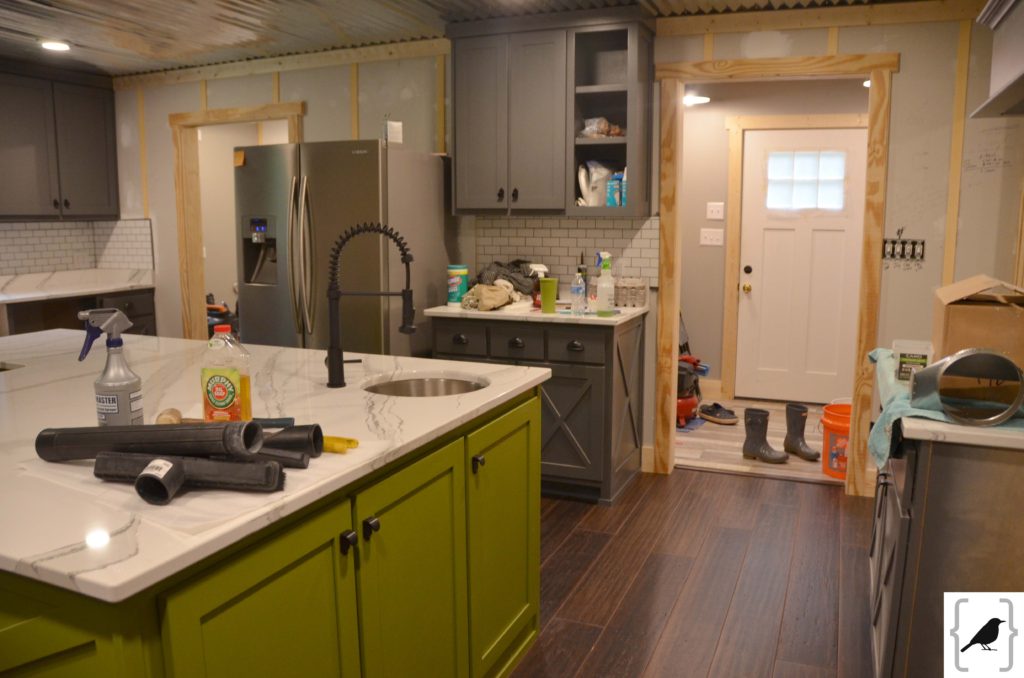
I feel the labor pains coming on! Wolf is being delivered today!
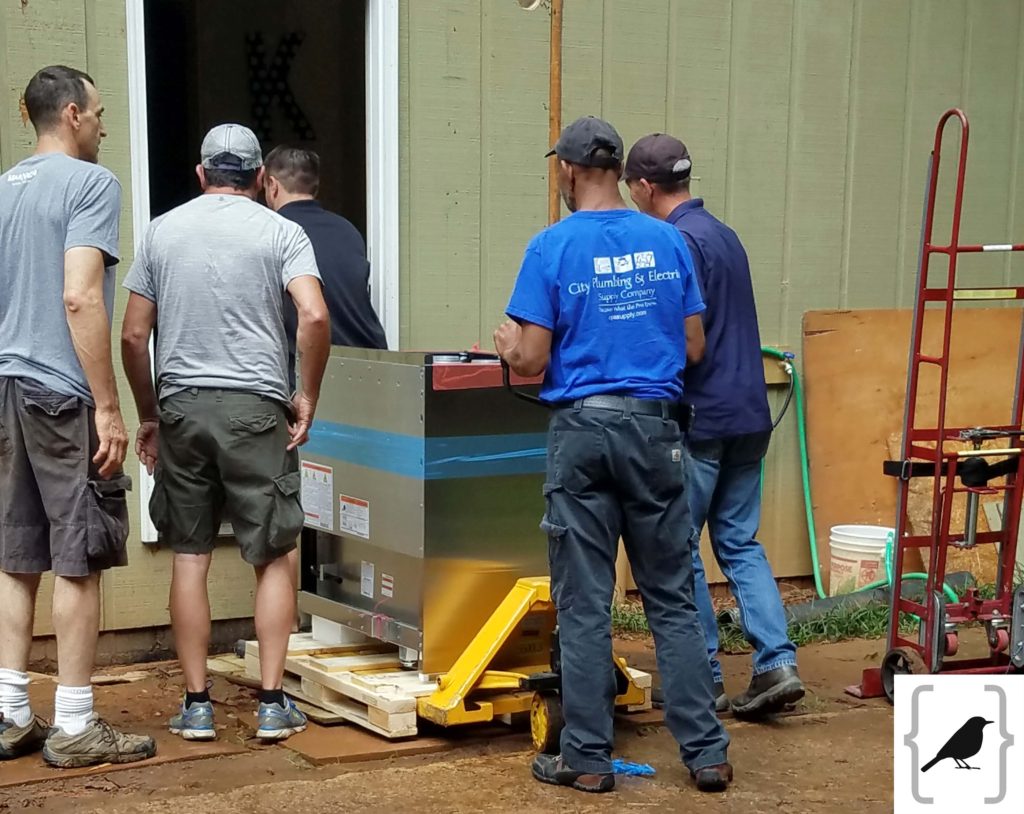
THIS… this is what I had always dreamed would be delivered today but we gave birth to a smaller more economical model. In hindsight if there was one thing about the entire renovation I would go back and change it would have been to get the 6 burner with the griddle {a step down from this bad boy who costs as much as a car and would never, could never justify, but if it was ever gifted to me I certainly would be courteous and accept it}…. but none the less… tears of joy when my 6 burner baby was delivered!
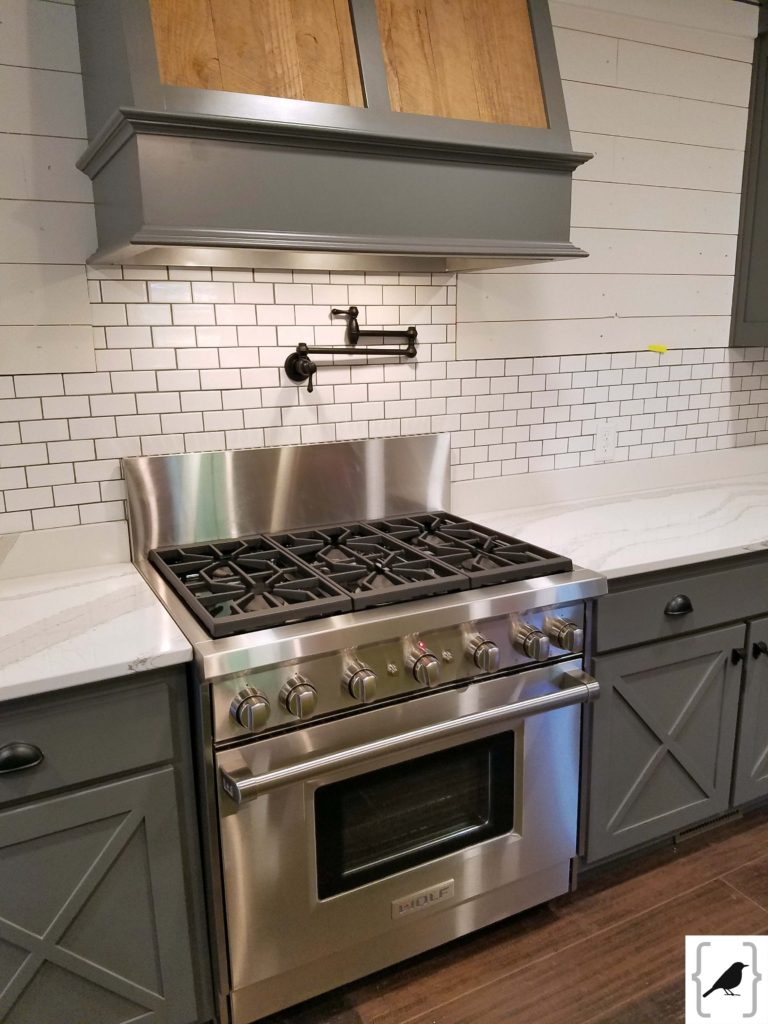
Meet WOLF. 6 burners. a few hundred pounds. 10″ stainless back splash accessory and one heck of an awesome potfiller to go with him! He’s so shiny and we’ll be lifelong friends, I just know it! Hubby really wanted the red knobs and I was like, N.O…. but I told him he can put them on for Christmas!
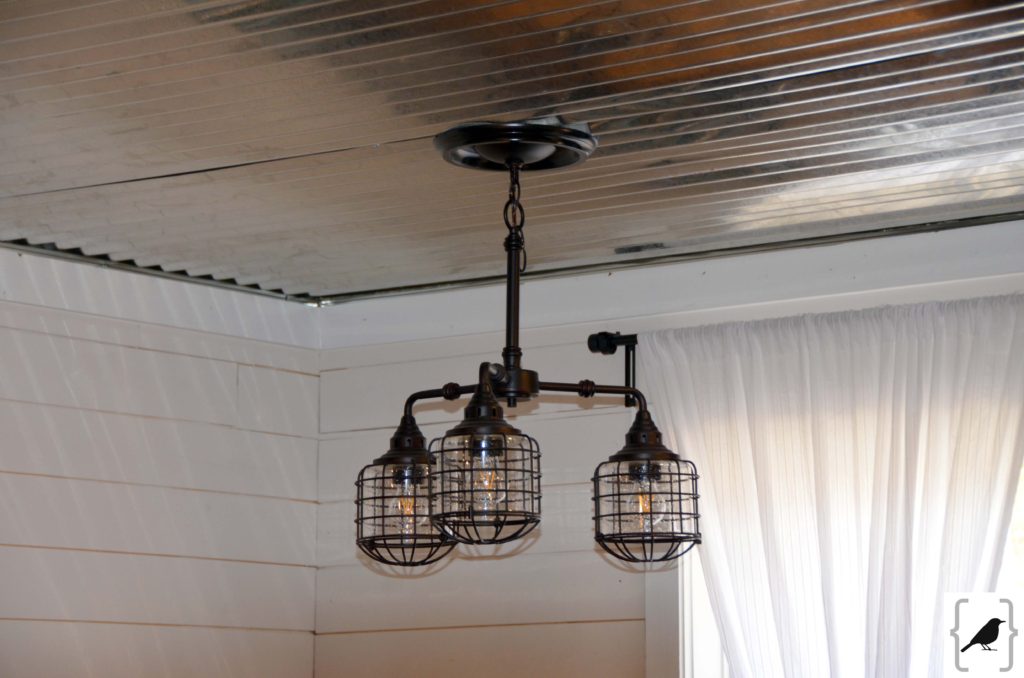
LIGHTING… wow, what a decision. Going in to the lighting store is enough to make your head spin and your neck hurt! One thing I knew for sure was that I wanted BIG GIRL LIGHTING. I wanted all the lighting throughout the house to MATCH. So all the rooms with hardwood floors received a version of the Savoy House Connell collection in the English Bronze finish {which was like a matt black}. I love how they are a bit farmhouse, a bit industrial, a bit eclectic and still add warmth and I also love the Edison style bulbs! So happy with our choice!
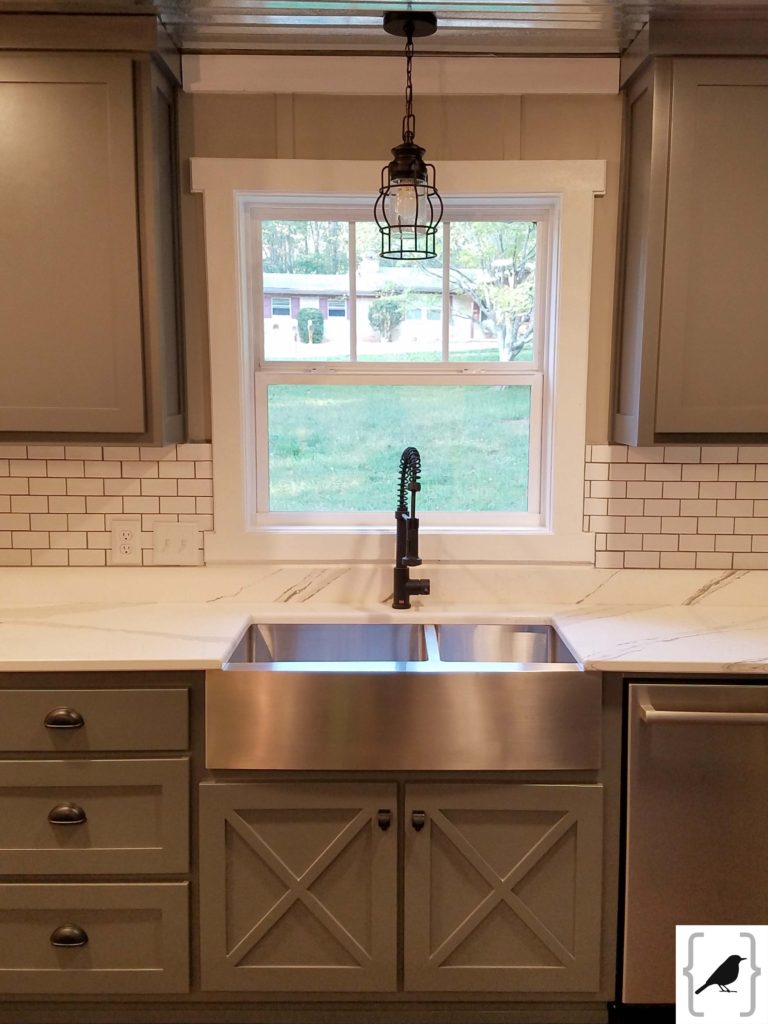
Industrial matt black faucets! So thrilled with this choice! I love how it ties in with the lighting fixtures and gives a pop against the white trim, backsplash and counter tops rather than going with stainless and just blending in with the sinks.
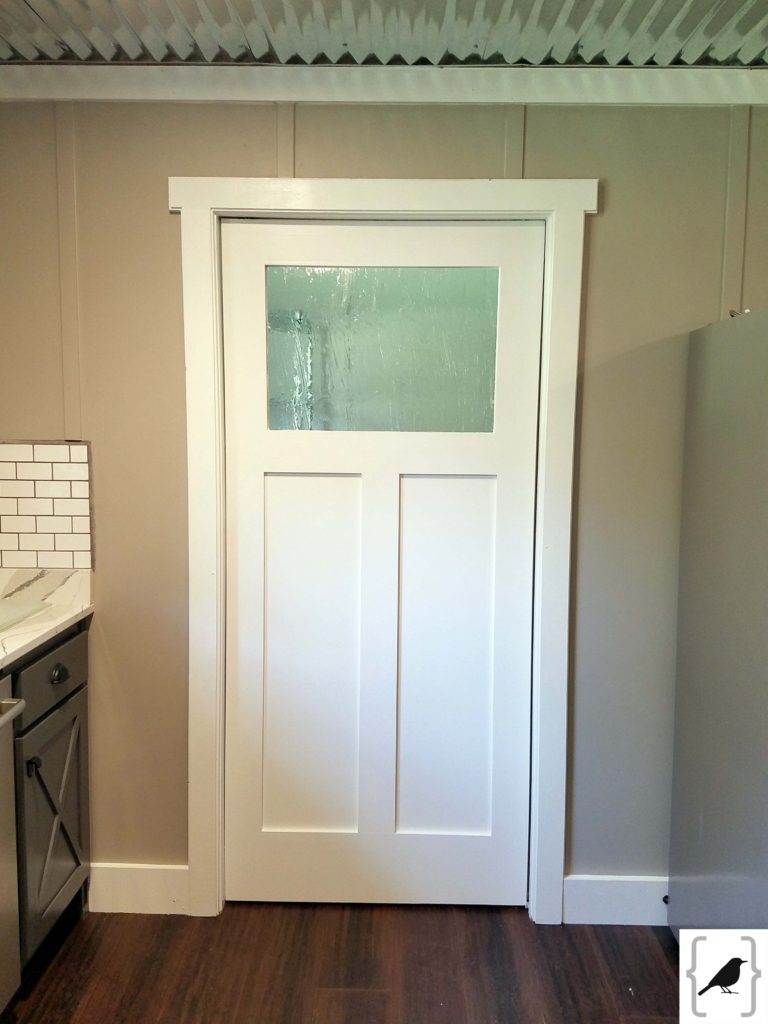
Oh heavens, my custom built pocket door! I’ve always loved those doors in restaurants reminiscent of old diners that swung and had glass windows. While I didn’t want a swinging door to pop me in my back side, I did want something more nostalgic and to be a unique design element. I think we hit the nail on the head! A perfect functional piece to act as a focal point and as an entrance to the pantry & mudroom! And see the battens now that they are painted? They look like they were always meant to be!
What is it about built in bench seating in a kitchen that says “come sit and stay a while”? I am beyond thrilled with how it turned out. So much storage, hidden AC return, a USB plug so the area can also be used as a work station and the use of barnwood from our treasure hunt!
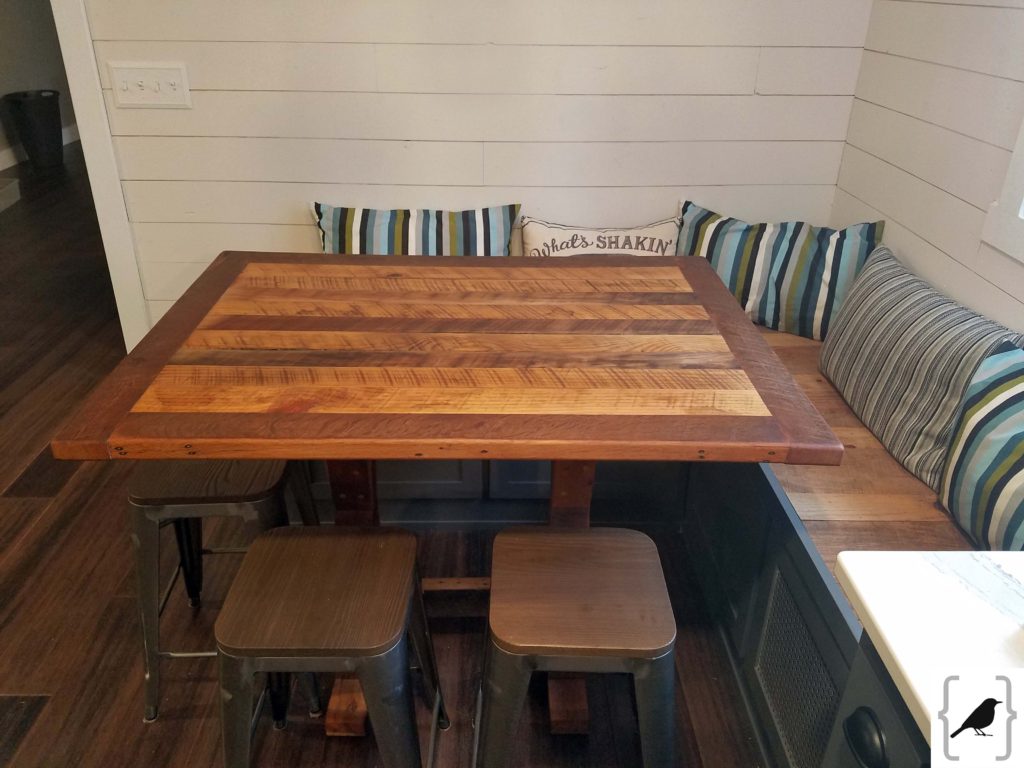
And then there was the quest to find a table that didn’t exist ANYWHERE. Why? Because the size of the space is not standard and we did the benches for a “counter height” table as I wanted the table to flow from the height of the kitchen counters in order to be able to use it as additional prep space. So a very talented friend took some of the barnwood and created this beauty for us!~ The frame around the edges you see is Walnut… one of the biggest treasures from our hunt! This is unstained, but simply sealed with beeswax and coconut oil. LOVE IT and so thankful for his talent! An extra bonus that we were able to use the stools from the breakfast bar at our previous home. We can actually seat 7 people in this cozy nook!
A bit better of a view of my spice/storage cabinet with the punched tin! Did I mention that I LOVE this cabinet? And now that the walls are painted you can see the transition between the shiplap and the subway tile on the stove wall. I love how it is all white but each so distinct in tone/pattern that each element still POPS!
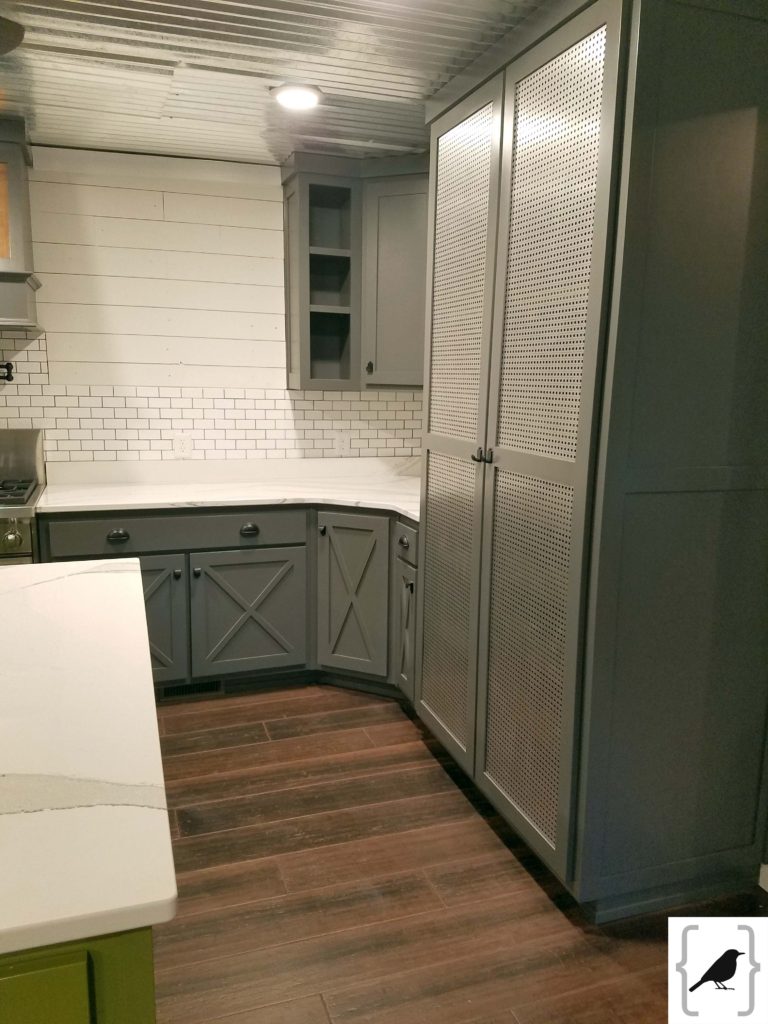
Another view of the island. This side is all zip lock bags, plastic wrap, paper plates, party supplies… things that we don’t get to as often since it is facing the frequently used fridge! Still one minor detail… a green outlet is being installed {you can see the blue electrical box} so that we will have power on the island as well be able to use that space as a work surface with laptop or whatever!
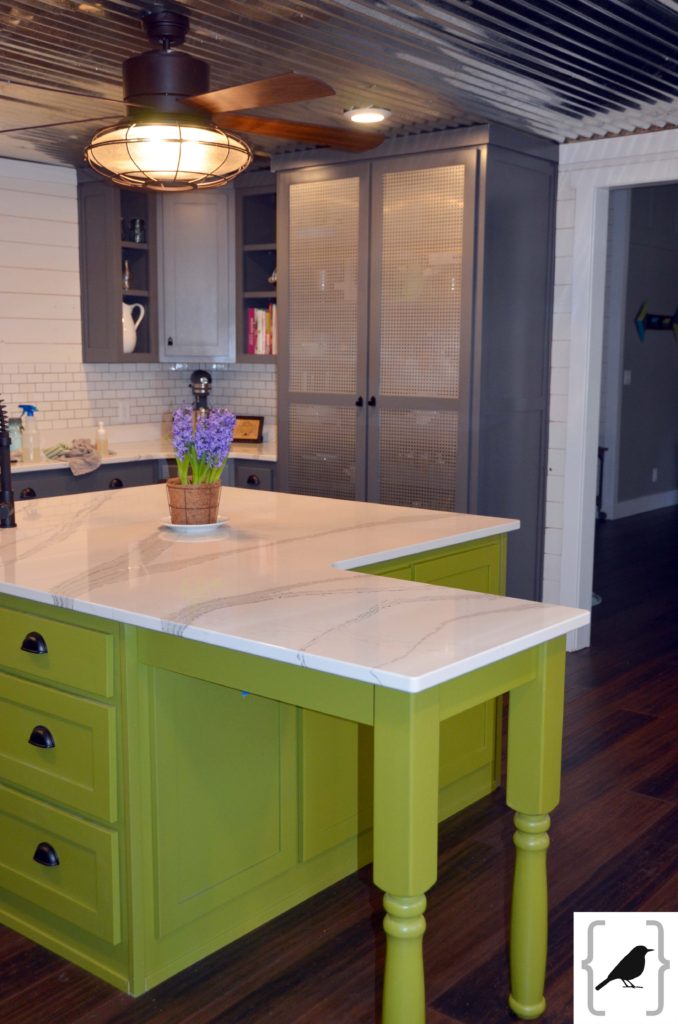
I left the cleaning supplies on the counter just so we can keep this real! There is never ever a time where there isn’t a mess of some sort!
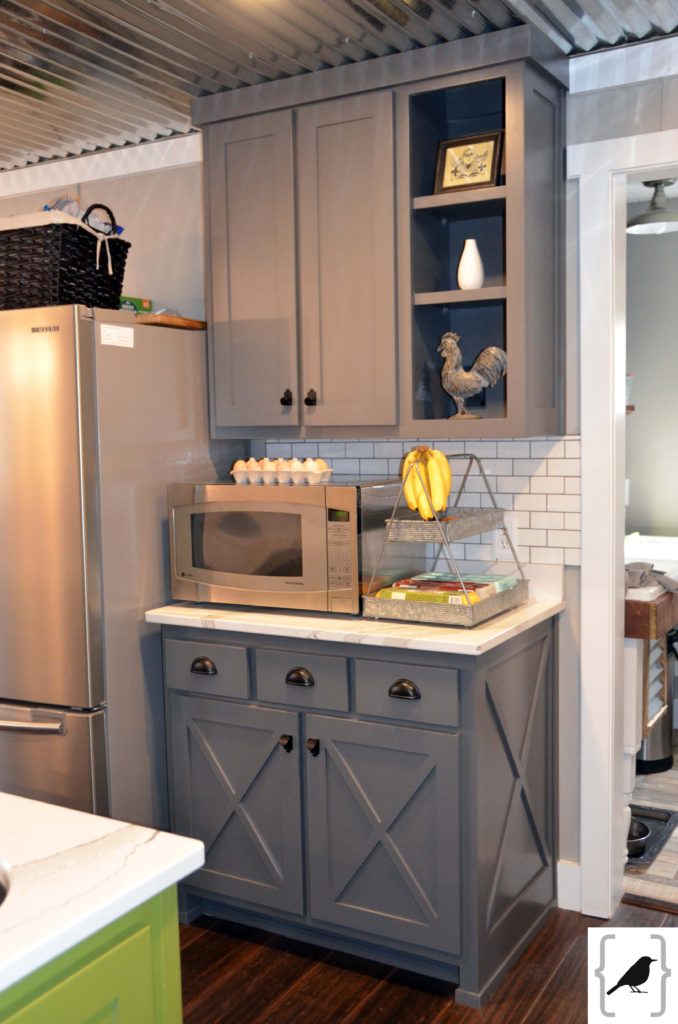
The original plan for this space was to do a coffee bar but for the time being we kept it next to the farm sink. The microwave is now gone {dead and buried} and a new smaller one {we don’t use it much} now resides on a shelf in the pantry and I am happy to have that ugly thing out of site not to mention it takes up prime counter space! Some day in a far away land when hubby gets his dream coffee maker this area may be transformed in to a place for my guy to create his morning crack! For now it stores my mason jars, outdoor serve-ware, fruit & fresh eggs.
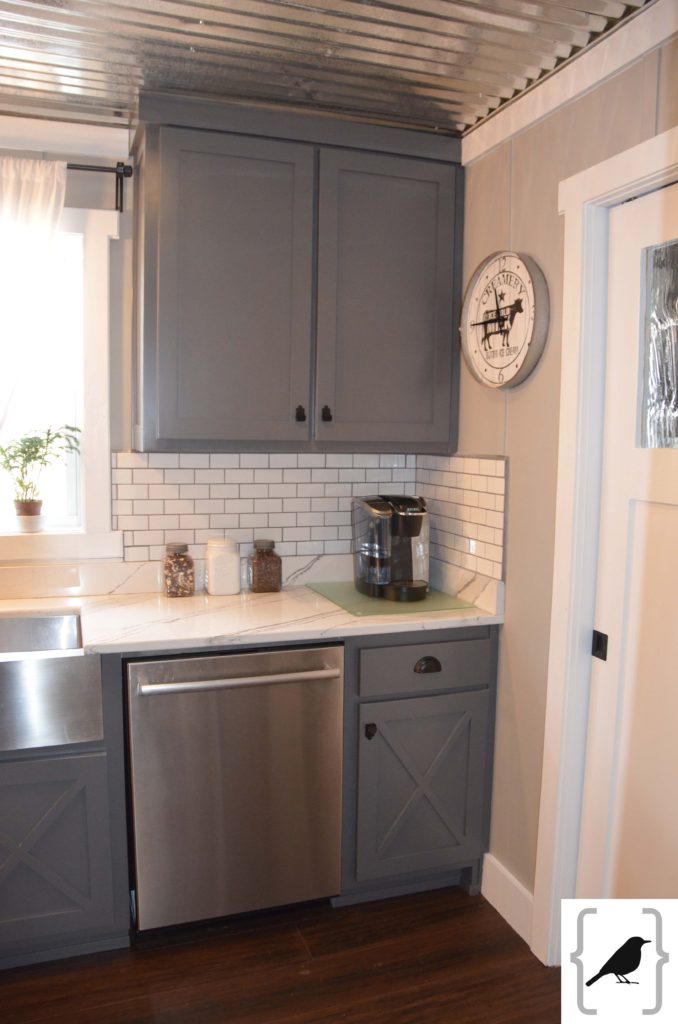
Curent “coffee bar” {i.e. ancient 10-model old Keurig still plugging along} I do love that he uses his mom’s old jars to store his coffee beans!
Well, that concludes the tour of the smaller details and now for a few “overall shots” to see how it all tied together! This view is from standing in the entrance to the Great Room. Sorry, yes the floors are dirty! It was these moments that I really just stood there in awe, jaw dropped, pinching myself that I was really standing in MY NEW KITCHEN… once just a dream in my head… now a reality!
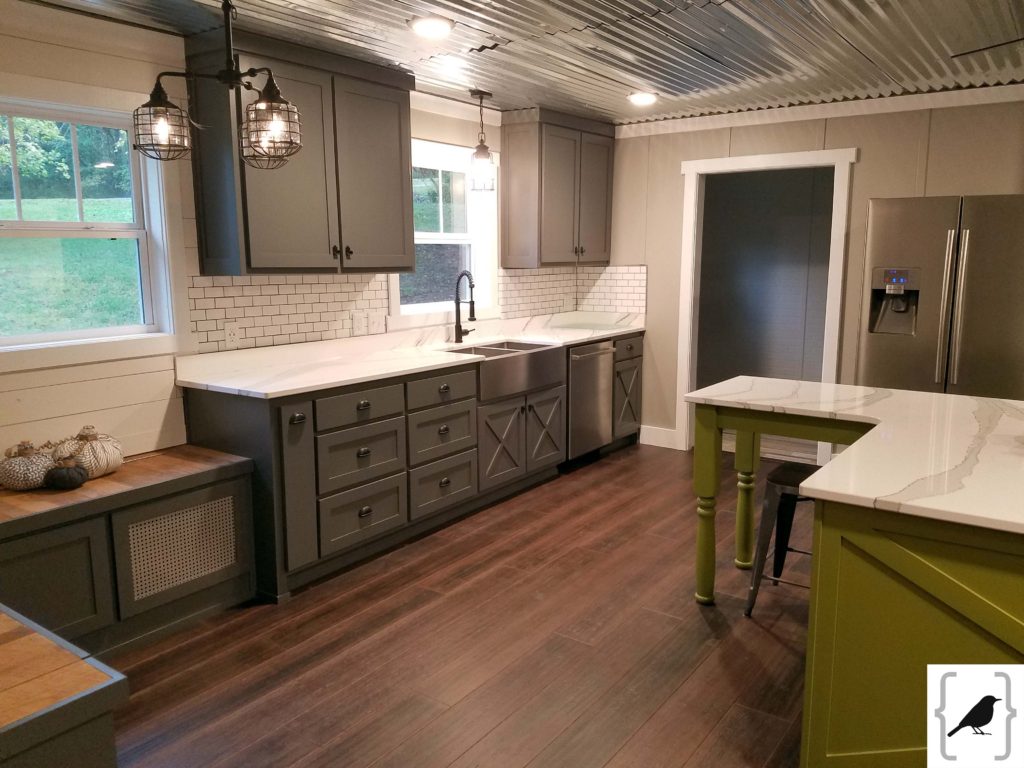
And here is a better view of the ceiling! We considered adding beams in the stain color of the floor but decided that is always something that could be added on should we EVER feel like it which is fairly unlikely considering how OVER we are of anything that requires a power tool or sand paper or a paint brush!
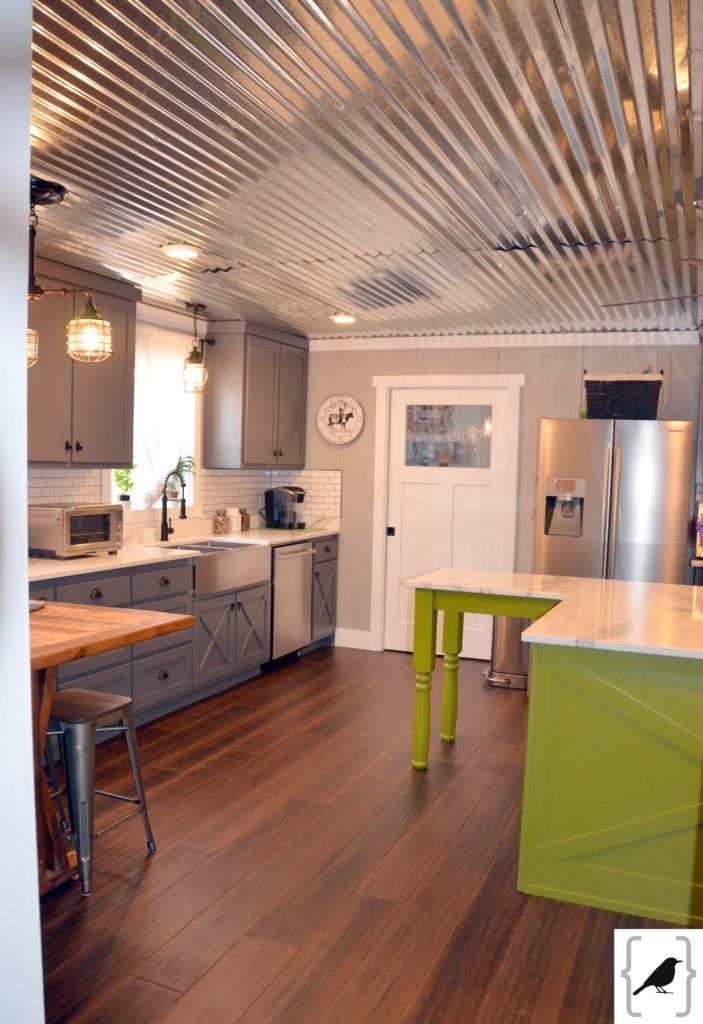
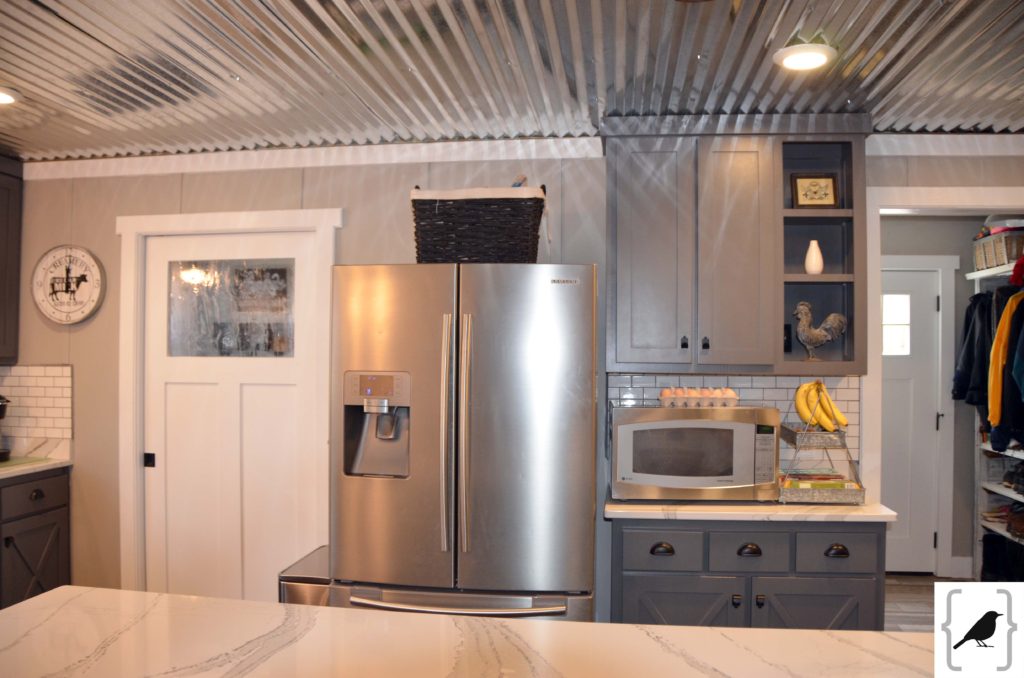
This is before the open shelving was hung next to the vent hood. I searched high and low for the shelving I wanted. Finally decided to build my own so went to Home Depot for hours and came home with the stuff only to see an ad on Instagram for the MOST UNIQUE AND PERFECT shelves to compliment the decor. Naturally, I went quickly to my computer, ordered them and returned the DIY project to Home Depot! So much nicer to open a box and hang something on the wall for a change! I think that is the first time I ever purchased anything through an ad on Social Media! And oh, look at that beautiful marble pattern on the island! My great big island! Oh how I love you!
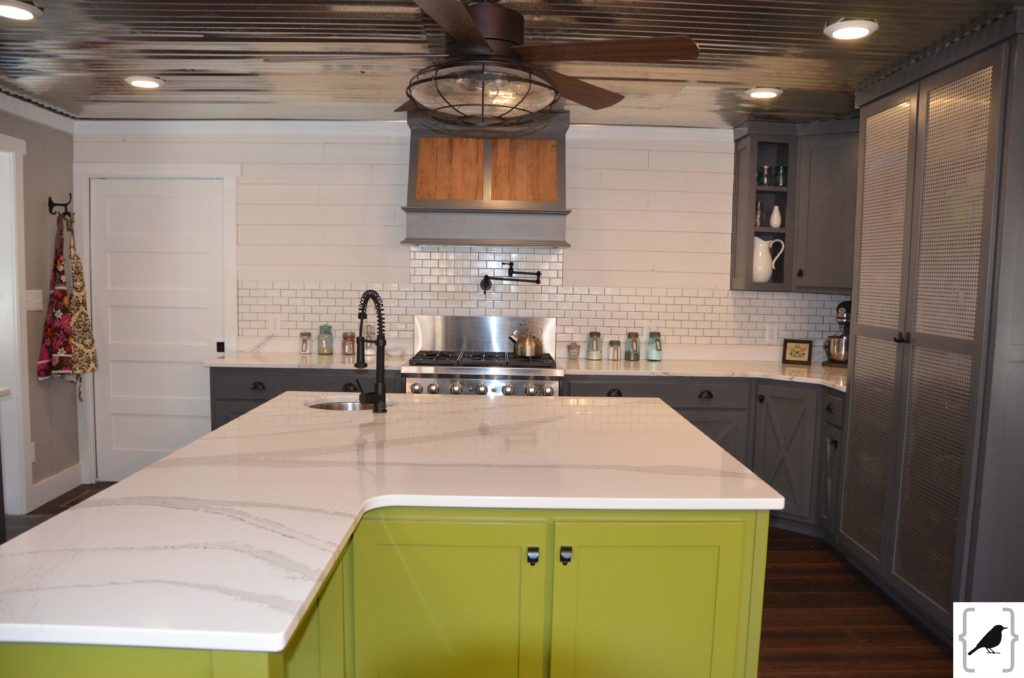
I’ll never tire of this view as I step in from the mudroom multiple times per day!
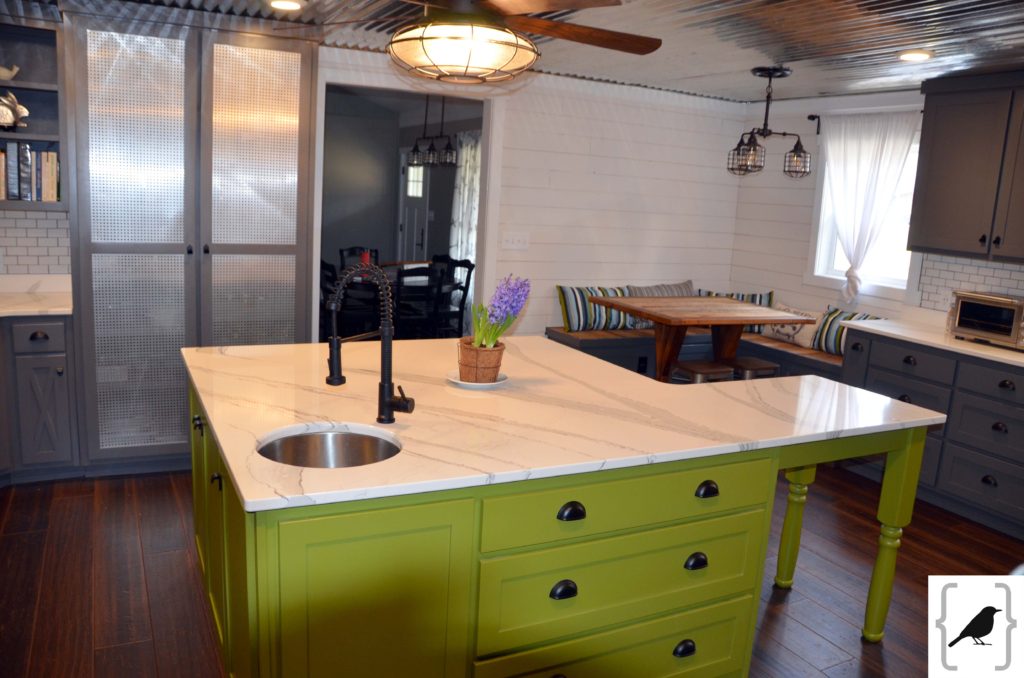
The one and ONLY day in the history of life in a home of 5 {plus always extra} that there were no dishes piled in and next to the sink! I’ll just bask in the cleanliness for a while! Oh… the curtains… TARGET… just simple white with a light embroidery pattern. Love how they filter the light giving it a softer look.
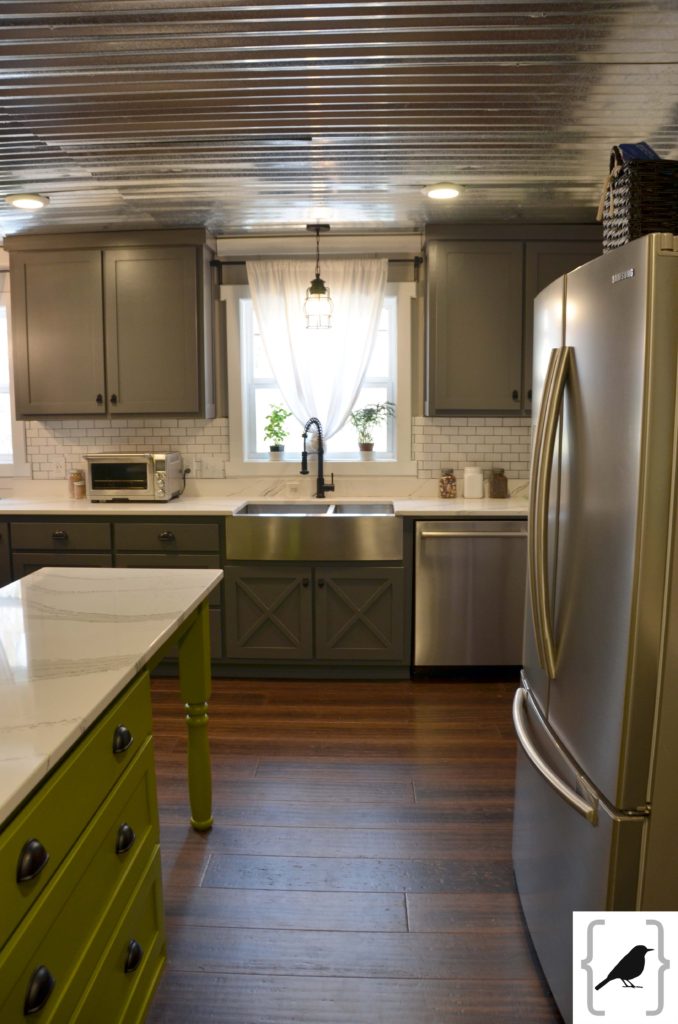
A little better view of the ceiling fan. This is the view from the spice cabinet side corner of the room!
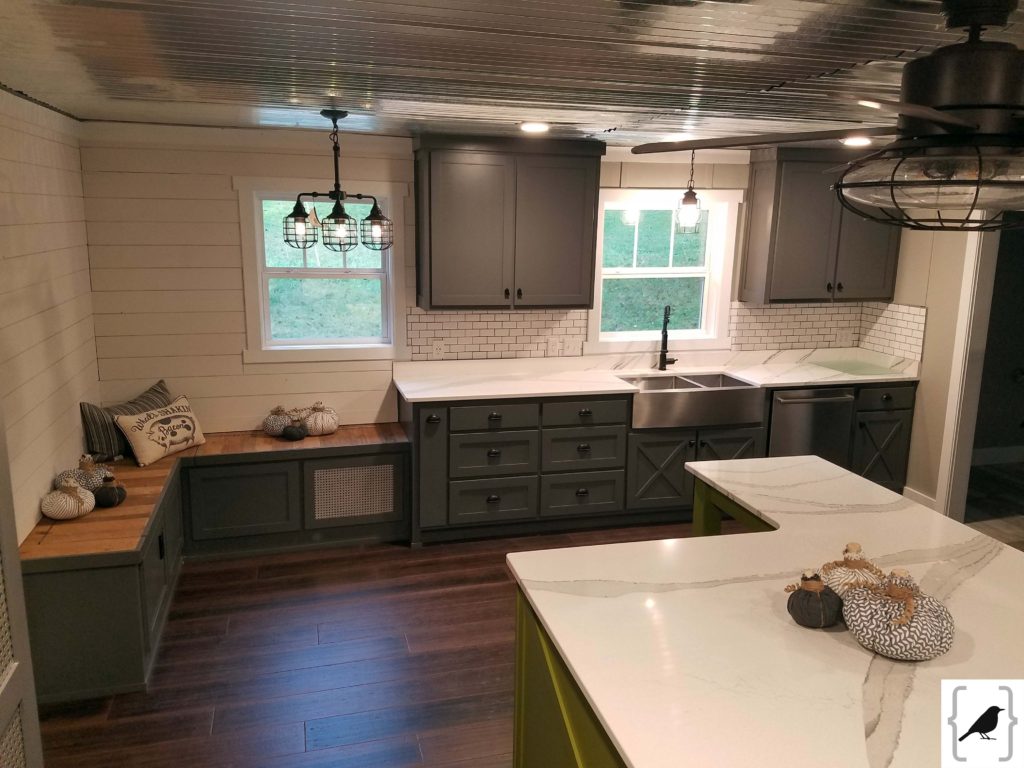
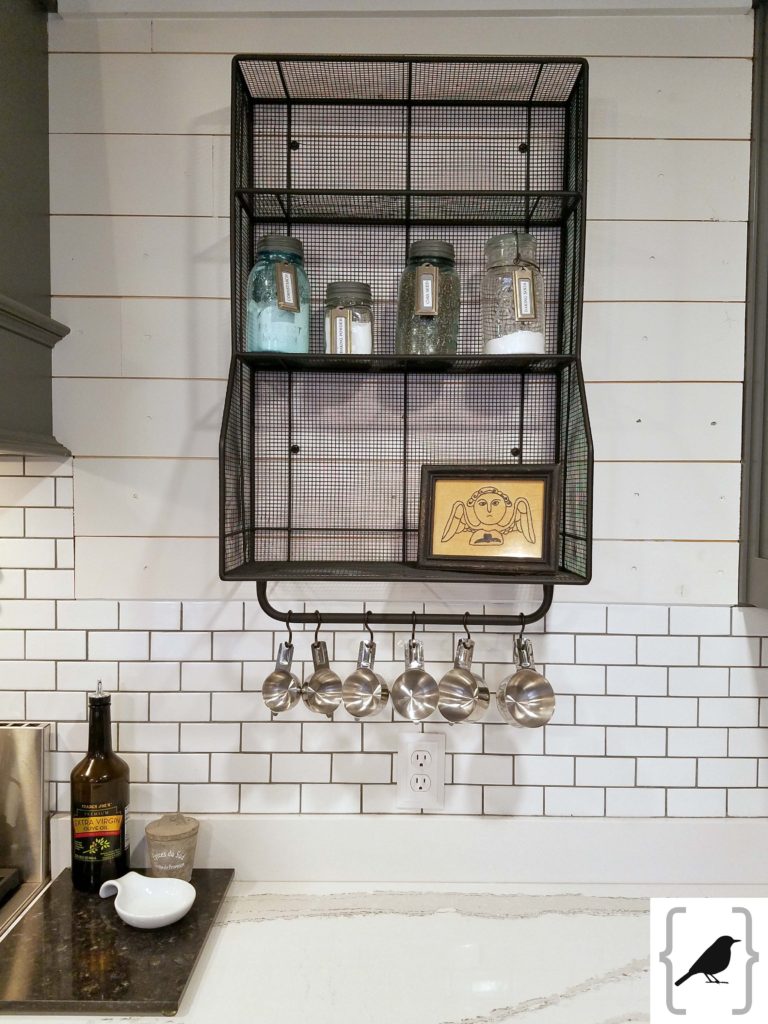
The shelves arrived from Pottery Barn! I LOVE LOVE LOVE how they compliment the matt black hardware throughout the ktichen. They were a deep bronze, nearly black, but I wanted them a true matt black so I spray painted them with Rustoleum which really made them pop off the white shiplap wall {Sherwin Williams Origami}. The mason jars are from my mother-in-law who passed away many years ago. I am not much for nick nacks but want all the accessories we chose to be useful. Her jars hold all my most used baking ingredients like baking powder, baking soda, cinnamon, flax seed, etc and I found vintage metal label holders from Ballard Designs. I love the little touch they add!
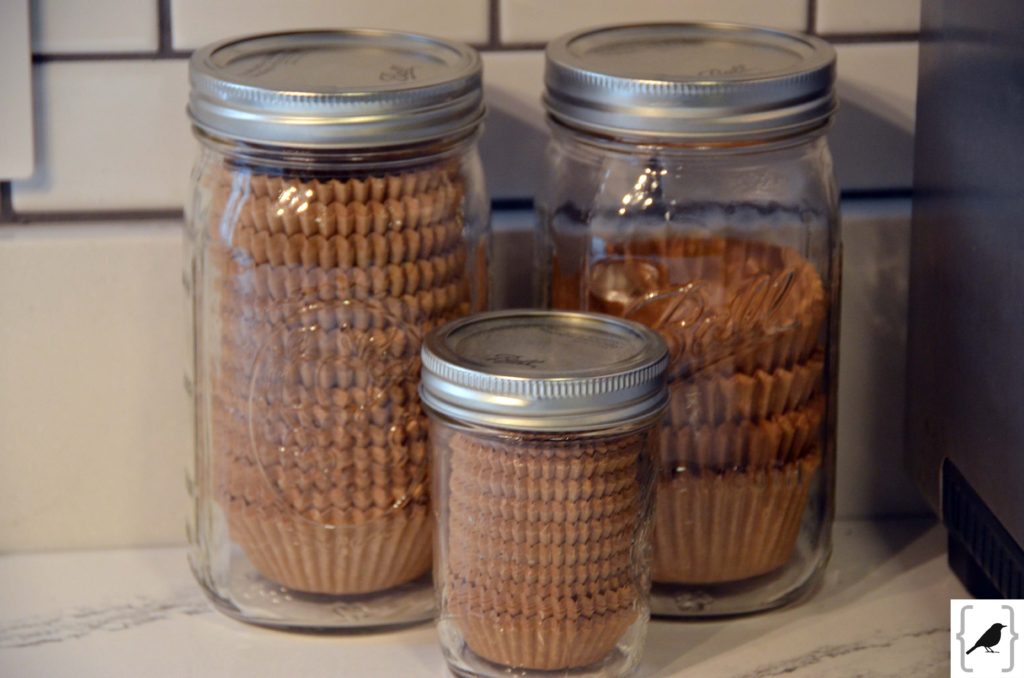
I go through A LOT of muffin tin liners; mini, regular and jumbo! Rather than store all those boxes in the pantry I love how they all nest perfectly together in Mason jars! {Parchment paper liners are my favorite!}.
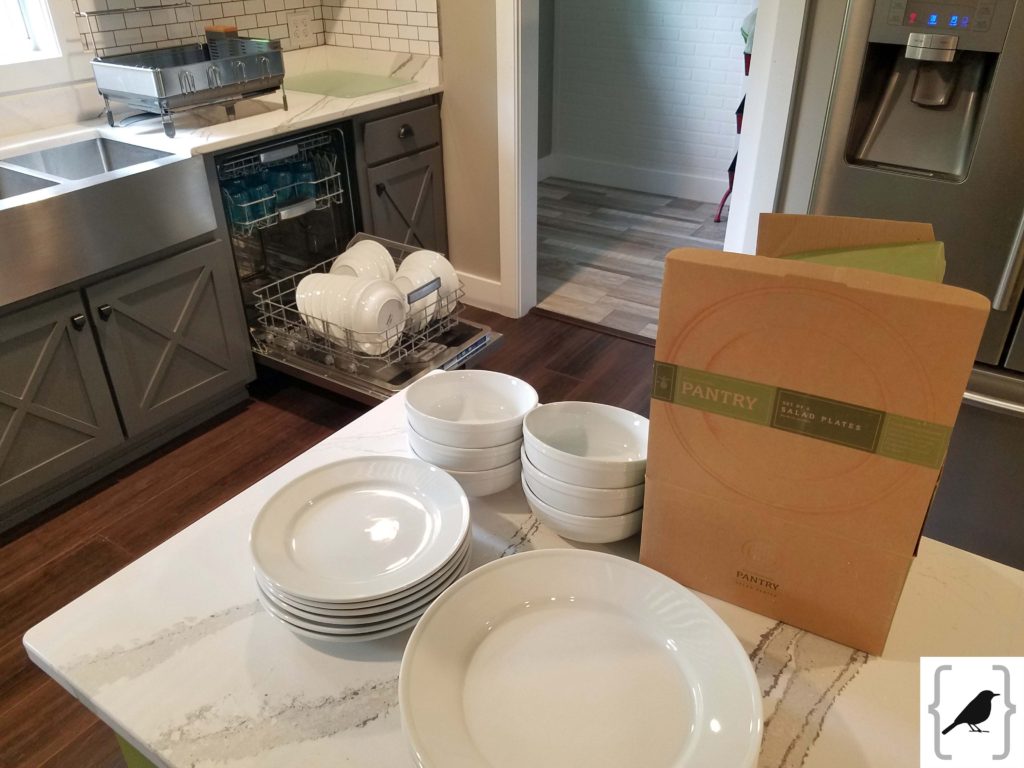
Ah, kitchen unpacking… normally a DREADED task, but when one of your favorite people in the world comes to help you it makes it so much easier and actually enjoyable! Since I had designed the kitchen based on our previous space and had already planned what was going where, it really made things go so much smoother! Friends also help you get rid of stuff you really don’t need! The William Sonoma basic white pantryware dishes have stood up for 10 years. Not a single item has broken, ever! I love how food looks served on white, too {ok, maybe I’m weird but I reallyl like taking pictures of food which you can see in the “Let’s Eat” section of my blog!}
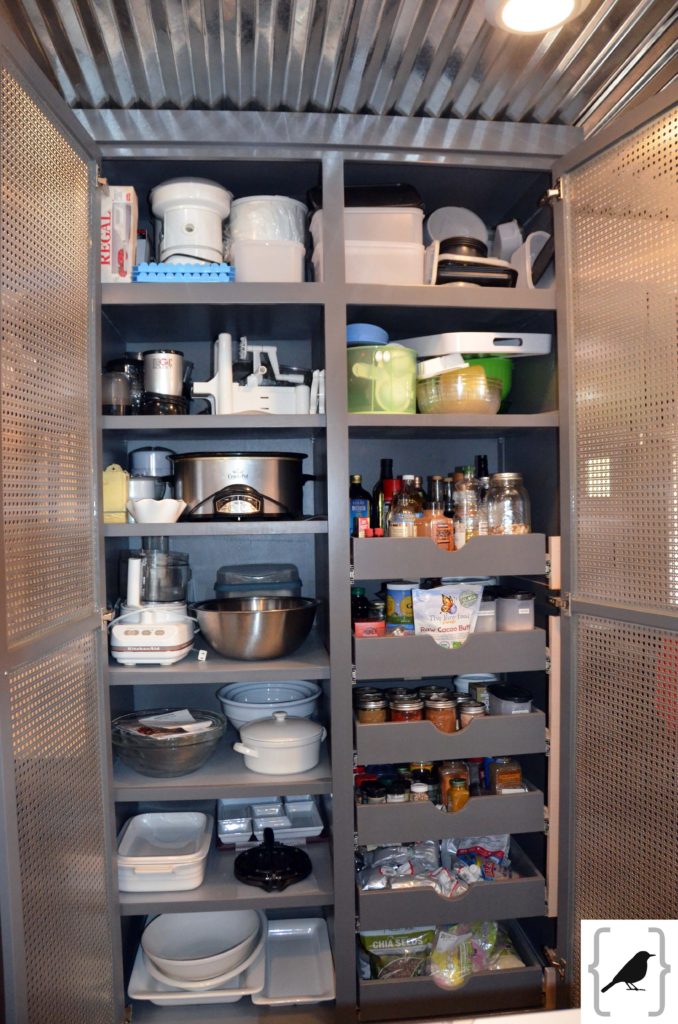
Now we are getting REALLY REAL…yes, I am “letting it all hang out”…. opening up my spice/storage cabinet for the world to see! Grain mill {funny blog post I did when I got mine}, crock pot, spiralizer, food processor, favorite white storage bowls & platters, prep bowls, XL food storage containers, tortilla press and PULL-OUTS full of all my go to spices, baking ingredients and oils! Couldn’t live without this space in my kitchen!
Ok, one more “Before & After” recap because you’ve scrolled through A LOT of pictures!
Goodbye 1970’s kitchen! You were groovey back then…
Actually, let me pause before we have this little recap and take this “renovation post” to a deeper level because it’s not just about the transformation of a new space or the trials that come with that endeavor…
It’s funny to hear peoples reactions to our new home and this space in particular. “You’re so lucky” is a common one! Let me just preface that by saying that never in a million years would I have wanted or asked to go through what we went through to end up where we are. I would not wish it on anyone for any reason. There is always more to the story… so much you don’t know about where a person or family came from or what they’ve walked through {and I’m not talking termites, mold or water damage!}. I’ll suffice it to say, this is where God wanted us. His ways of blessing us often come from walking through the pit of hell which we have, in a way incomprehendable to many, and while life will never be the same, we are thankful for Him carrying us through and giving me this dream kitchen and our family this new homestead as one of the blessings He poured out on us in this stormy season… Something new and beautiful does not remove pain… sometimes it makes you yearn deeper for something that just can’t be. Amen. Ok, sermon over…

~~~AFTER~~~


Thanks for touring our new kitchen! I’m curious… what is your favorite part of it?
If you’re ever in town, stop by for a hot beverage or sweet tea please!
And thanks for remembering that all content, stories and photography on my blog are created by me
and copyrighted unless otherwise noted.

Oh my GOSH!! How fabulous. You’ll have to teach me how to use a mitre saw. I’ve got baseboards to replace. I am amazed and impressed. Hopefully, we will make it to see our relatives in Georgia and try a side trip to see this huge undertaking in person. Wow, wow, and wow! Congratulations!
Thanks Nancy! Quite an under taking but it’s rewarding each day to look around and know that it was our blood, sweat and tears (lots of tears) that got this job done. HGTV shows are all lies! That would just be the BEST thing ever if you guys came through town!!! We can certainly do a miter saw tutorial! My love to you all!
Absolutely gorgeous and fun! Love it and you! Fantastic lady you are.
Thank you, my friend!!!!! love you too and hope for another visit SOON!!!